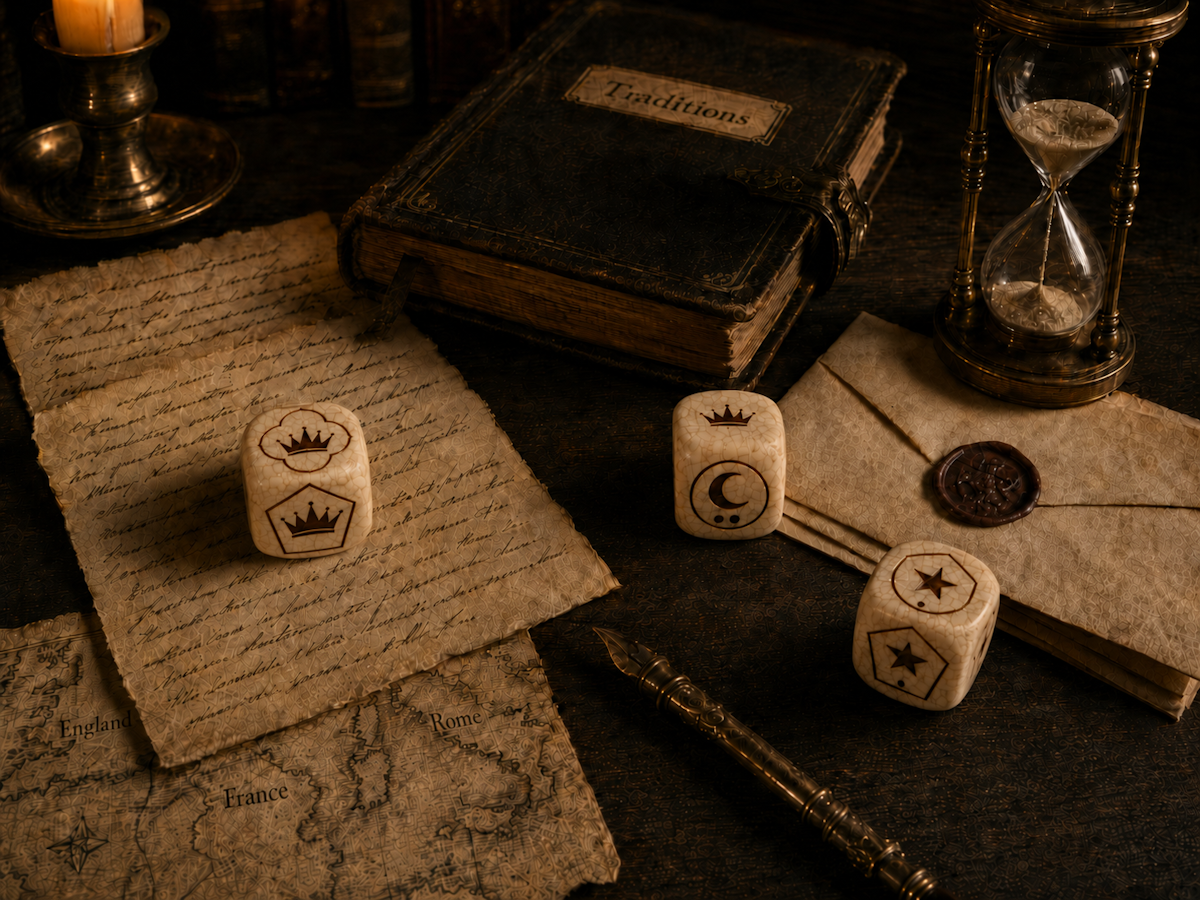
England
Land remembered the loser.

A noble game of Crowns, Signs, honor, and speed.
Once played, so the old stories claim, by cardinals beneath Vatican candles, by English lords over maps of disputed land, and by courtiers in the jeweled rooms of France, Astral Assembly, also known in certain courts as Astral Array, is a contest of sharp eyes, quicker judgment, and shifting omens.
The dice are public.
The intentions are not.
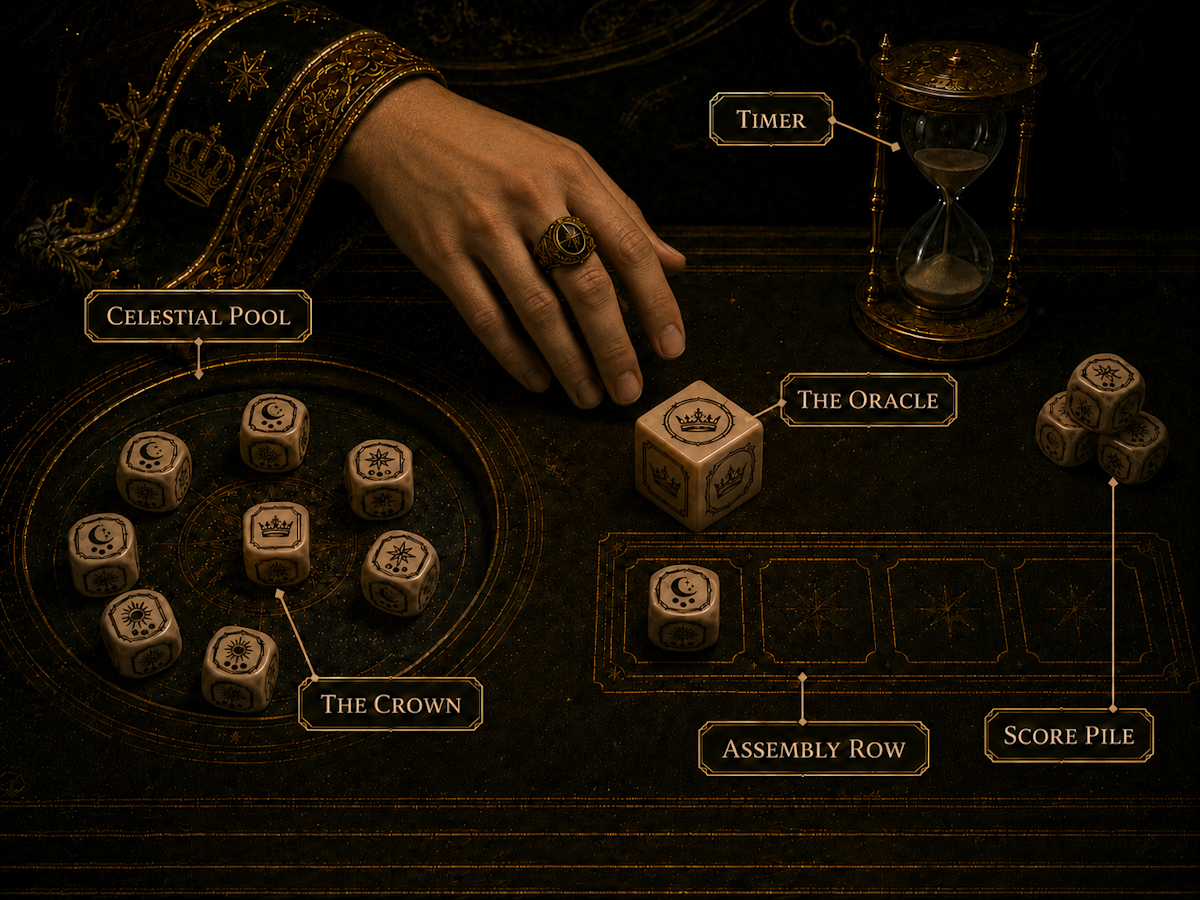
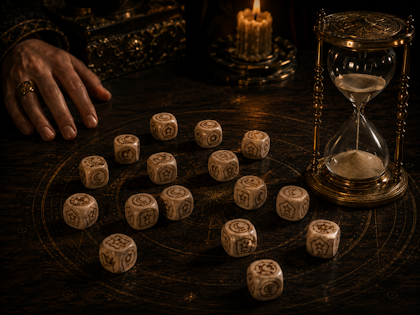
Read the Celestial Pool. Shape your Assembly Row. Call the Sign before the final sand escapes the glass.
For those who believe thought should move faster than fortune.
A Game of Courts, Crowns, and Quiet Ambition
Before it was called Astral Assembly, some knew it as Astral Array.
The name changed from court to court, but the table remained the same: Astral dice at the center, the Oracle waiting apart, an hourglass breathing sand, and players who understood that hesitation could be more costly than defeat.
Old stories place the game in candlelit Vatican chambers, where cardinals wagered influence rather than coin. They place it in the halls of England, where lords are said to have risked land, rents, and river rights on a single sign. They place it beneath the chandeliers of France, where courtiers watched not only the dice, but the hands that dared to move them.
Whether such tales are history or ornament is left to the player.
What matters is the feeling they preserve:
A noble game.
Easy to enter.
Difficult to command.
Merciless to the slow of mind.
In Astral Assembly, every die is visible, yet every intention is hidden. The winner is not always the boldest, nor the luckiest, nor the richest at the table.
The winner is the one who sees the stars assemble first.
The official history of Astral Assembly
Land remembered the loser.
Influence was the wager.
Hesitation was entertainment.
There are games made for taverns, games made for soldiers, and games made for children beneath the stairs.
Then there is Astral Assembly.
In certain old corners of Europe, where the records are perfumed with dust and candle smoke, the game is also known as Astral Array. Some say this was its older name, used in the private libraries of bishops and princes. Others claim the two names belonged to rival courts, each too proud to adopt the other's tongue.
Whatever name was spoken, the meaning was understood.
At the heart of the table lay the Oracle, whose judgment named the Halo of the hour and cast disfavored faces back into the common sky.
This was a game for those who wished to prove the sharpness of the mind before witnesses.
Not strength.
Not wealth.
Not birth alone.
A player sat at the table with nothing but eyes, nerve, memory, and the courage to act before the last sand slipped through the hourglass.
The earliest tales place Astral Assembly in rooms where ordinary men were never invited.
It was played behind carved doors in the Vatican, among cardinals whose rings caught the firelight as they reached toward the Celestial Pool. They did not always wager gold. Gold was a small thing to men who could summon it with a letter. Instead, they wagered influence. A name advanced. A post promised. A silence purchased. A door opened at the right hour.
There are whispers of one cardinal who won three games before midnight and, by dawn, saw his favored nephew placed in a position that had been denied him for years.
Whether this story is true is less important than the fact that it was believed.
From Rome, the game moved northward, as all dangerous amusements eventually do. In England, high lords played it in long halls while rain struck the windows and dogs slept beneath the table. They wagered hunting rights, parcels of land, winter rents, and once, according to a much-disputed account, a strip of riverbank that later became the cause of a thirty-year family quarrel.
A careless lord might lose a vineyard.
A patient one might win a valley.
A brilliant one might win both and leave the table before dessert.
In France, Astral Assembly became a jewel of the royal courts. There, it was played on polished tables beneath chandeliers, surrounded by silk sleeves, painted fans, powdered faces, and watchful smiles. Courtiers gathered not merely to see who would win, but to see who would hesitate.
For hesitation, in court as in Astral Assembly, was often fatal.
Those who have only read the rules cannot understand the music of the game.
The soft scrape of a die drawn from the Celestial Pool.
The bright clatter as dice are stirred and cast back among the others.
The breath that catches when a Crown appears.
The hush that follows the Oracle's judgment.
The small, terrible silence before a player says, "Astral Sign."
Above it all waits the timer.
In the oldest houses, it was an hourglass, narrow as a throat. The sand did not fall. It lingered. It threatened. It reminded every noble hand at the table that thought is precious only when it arrives in time.
A player might see the pattern forming.
A player might know the perfect move.
But knowledge trapped behind delay is no better than ignorance.
So the hand must move.
The die must turn.
The Sign must be called.
The stars favor the swift, but they do not forgive the foolish.
Astral Assembly earned its reputation as a noble game because its gates stood open, yet its throne remained distant.
A child could learn the motions. Claim. Recast. Shift. Parley. Stir the Pool.
But mastery was another matter.
To Claim is to declare desire.
To Recast is to cast one certainty back into chaos.
To Shift is to touch fate with a single finger.
To Parley is to smile while measuring another soul.
To Stir the Pool is to confess that the heavens, as they stand, are not yet worthy of you.
Every die is visible, yet nothing is simple. Every player sees the same table, but not every player sees the same future. The novice watches their own Assembly Row. The practiced player watches all rows. The master watches the row, the pool, the Oracle, the hands, the hunger, the fear, and the time.
This is why kings loved it.
A battlefield could be blamed on weather.
A council could be blamed on poor advice.
But across the Astral table, under the gaze of rivals, there was nowhere to hide.
A king who played badly looked mortal.
A cardinal who called falsely looked vain.
A lord who missed an obvious sign was remembered for it longer than he wished.
The game's three Astral Signs were not always treated as mere patterns. In the old courts, they were read almost as omens.
The Omen was the sign of hidden truth. Three Crowns gathered around one die marked by the Oracle Halo, like rulers listening for the prophecy of the hour.
The Seal was the sign of authority. Two Crowns stood over two lesser powers made perfectly alike: same Shape, same Halo, same count of dots. It was loved by judges, ministers, and men who believed order began with exactness.
The Eclipse was the sign of brilliance. One Crown above three celestial bodies of one nature and one number, each bearing a different Halo and none bearing the Oracle Halo. It was admired in France above all, where elegance and danger often wore the same perfume.
To complete a sign was not simply to score. It was to reveal, for one shining instant, that the chaos of the table had obeyed your mind.
The grandest legends of Astral Assembly are, naturally, the least trustworthy.
One tells of an English duke who entered a match with three estates and left with two, yet laughed as though he had won, because the estate he lost was swamp and debt from border to border.
Another tells of a French courtier who won a royal favor on an Eclipse made with only a breath of sand remaining in the glass. He later spent that favor to marry above his station, which proves either the power of the game or the recklessness of love.
In Rome, it was said that certain games ended without applause. The winning player would merely collect his score, kiss his ring, and leave the room, while the losers sat very still, already calculating what the victory would cost them by morning.
Such stories are part of the game. They cling to the dice like candle wax.
Perhaps no king truly lost a province over Astral Assembly.
Perhaps no cardinal truly traded a bishopric across the Celestial Pool.
Perhaps no queen ever watched from behind a veil and chose her favorite by the steadiness of his hand.
But every player, sooner or later, understands why such stories were told.
The game makes the table feel royal.
It makes silence feel expensive.
It makes a single die feel heavy enough to change a kingdom.
Astral Assembly preserves the challenge.
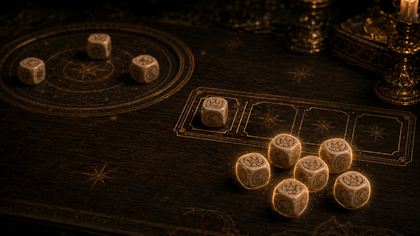
The Celestial Pool waits at the center.
The Crowns glitter with promise.
The Oracle names the Halo of the hour.
The Signs appear and vanish as the heavens change their mind.
Around the table, every player becomes something more than a player. A strategist. A courtier. A rival. A mind under judgment.
The dice strike the table.
The sand continues its descent.
Someone sees the pattern.
Someone sees it too late.
And then, with the calm of a monarch or the certainty of a cardinal, one voice rises above the hush:
"Astral Sign."
Read the stars.
Shape the sign.
Prove your mind before the court.
The Noble Game, Plainly Spoken
Astral Assembly is a fast tactical dice game of pattern, pressure, and perception.
Players gather around a shared field of dice called the Celestial Pool. On each turn, a player takes, turns, trades, rerolls, or disturbs the dice, trying to build a private Assembly Row of exactly four dice.
But a row is not enough.
To score, the row must form one of the three Astral Signs: the Omen, the Seal, or the Eclipse. Each sign must include at least one Crown, yet Crowns do not score. They open the path to victory, then return to the Pool.
The Oracle die names the current Oracle Halo and returns incompatible faces from Assembly Rows to the Pool, so the table’s danger can change in a single roll.
The game is won by the player who scores the most non-Crown dice before the Pool runs low.
Every die is public.
Every choice is visible.
Every intention is concealed.
The rules are learned quickly. The table is read slowly. Mastery belongs to the player who can see order in the scatter before anyone else dares to move.
A game of open information, hidden plans, and royal pressure.
Open Dice. Hidden Intentions.
At the center of every game lies the Celestial Pool, a scatter of public Astral dice shared by all players. Nearby, the Oracle names the Halo of the hour.
Nothing is hidden there.
And yet, nothing is safe.
A Crown may wait in plain sight, desired by three players at once. A Moon may seem useless until a single Shift turns a row toward destiny. A Star may sit ignored for half the game, then become one of the matching bodies of an Eclipse if its Halo keeps clear of the Oracle.
Around the Pool, each player builds an Assembly Row. The rows are visible. The danger is visible. The ambition is visible. But intention is not.
One player Claims with confidence. Another Recasts with a calm hand and a desperate mind. A third does nothing to your row, then asks for Parley at the exact moment you understand what they have seen.
Above the table, the timer waits.
The sand lingers.
The dice strike wood.
The room grows quiet.
Someone sees the Sign.
In Astral Assembly, every turn is small enough to understand and sharp enough to matter. A die may be claimed, a row may be shifted, a bargain may be struck, or the Oracle may cast carefully gathered dice back into the Pool. A careless Shift or dangerous Oracle resolution may complete another player’s Sign and turn your own score pile into their prize. A single hesitation may invite Sabotage. A single false sign may return a hard-won point to the Pool.
The table rewards the player who can look at disorder and see a path.
The dice are public. The mistake is private until the table hears it.
The Celestial Pool belongs to everyone. Every Crown, every dot, every halo, and the current Oracle Halo may become useful to the player who notices it first. Look for exact twins, missing Eclipse Halos, Omen-Halo dice, and the dice the Oracle has suddenly made dangerous.
Your rivals build in public. Their Assembly Rows reveal what they want, what they fear, and what they are one die away from completing.
The hourglass does not rush. It simply continues. The player who thinks too long gives the table permission to punish them.
A Shift, a Parley, a Stir of the Pool, or an Oracle roll can change the shape of the game before a Sign appears. In Astral Assembly, defense can be as elegant as offense, but a careless Shift or Oracle resolution may bless a rival.
At this table, the stars do not belong to the lucky. They belong to the player who sees the pattern first.
When Chaos Agrees to Form
A player does not score by gathering beautiful dice.
A player scores by assembling a Sign.
Each Astral Sign is made of exactly four dice in an Assembly Row. Each must contain at least one Crown, for no noble pattern is recognized without authority.
But Crowns are not trophies. They are keys.
When a Sign is called, the non-Crown dice move to the score pile. The Crowns return to the Celestial Pool, rolled back into the common fate of the table.
The Oracle die sets the current Oracle Halo. The Omen needs that Halo, while the Eclipse must avoid it.
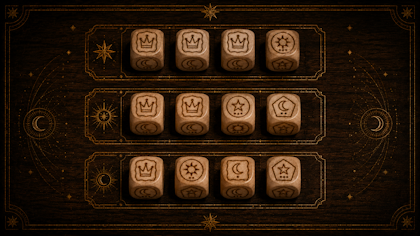
Three Signs are known.
One is sudden.
One is balanced.
One is brilliant.
A single truth surrounded by power.
3 Crowns + 1 Oracle-Halo scoring die
Exactly 3 Crowns and 1 non-Crown die with the current Oracle Halo.
The non-Crown die scores 1 point. The Crowns return to the Celestial Pool.
After an Omen scores, the scoring player rolls the Oracle die. A Crown sends every Crown showing in every Assembly Row back into the Celestial Pool, then the Oracle passes clockwise. A Halo becomes the new Oracle Halo and sends every non-Crown row die with a different Halo back into the Pool. If the Oracle resolution leaves an opponent with a valid Astral Sign, resolve Blessing in Disguise.
The Omen is the quietest Sign and often the most unsettling. It appears when three Crowns gather around the die marked by the Oracle Halo, as if the Oracle has named the hour.
Authority made precise.
2 Crowns + 2 exact matching scoring dice
Exactly 2 Crowns and 2 non-Crown dice.
The two non-Crown dice must have the same Shape, the same Dots, and the same Halo.
The two non-Crown dice score 2 points. The Crowns return to the Celestial Pool.
The Seal is a Sign of judgment. It rewards the player who recognizes perfect sameness: two identical lesser powers authorized by two Crowns.
Brilliance under a single Crown.
Same Shape, same Dots, all-different non-Oracle Halos
Exactly 1 Crown and 3 non-Crown dice.
The three non-Crown dice must have the same Shape, the same Dots, Halos that are all different, and no Oracle Halo.
The three non-Crown dice score 3 points. The Crown returns to the Celestial Pool.
The Eclipse is the most admired Sign. It demands repetition, discipline, and nerve: three matching celestial bodies beneath one Crown, each marked by a different Halo and none marked by the Oracle.
A valid Astral Sign is exactly 4 dice, includes at least 1 Crown, and can never be 4 Crowns. Only non-Crown dice score.
Every Sign requires a Crown.
No Sign may be made of four Crowns.
No Crown is ever scored.
After an Omen scores, the Oracle judges every Assembly Row. A Crown casts Crown-up row dice back into the Pool and passes the roll clockwise. A Halo names the new Oracle Halo and casts out non-Crown row dice that bear any other Halo. The judgment may even bless an opponent whose row remains complete.
The Crown grants authority, then leaves the hand.
To win Astral Assembly, a player must learn when to chase Crowns, when to release them, and when to call the Sign before the table understands what has already happened.
The Sign is not found. It is assembled.
The Ritual of a Turn
Astral Assembly is learned in moments, then studied for years.
Each turn is simple: choose one action, change the table, and look for a Sign. Yet every choice enters a shared field of pressure, memory, and ambition.
The Celestial Pool waits at the center.
Your Assembly Row waits before you.
The hourglass is turned.
Then the table belongs to your hand.
First choose the starting player by the dot roll. That player rolls the Oracle die. If it shows a Crown, no Halo is chosen and the Oracle passes clockwise. Continue until a Halo appears. That Halo is the Oracle Halo.
Then divide the 48 Astral dice as evenly as possible and roll them into the middle to form the Celestial Pool. All Pool and Assembly Row dice are public. Play clockwise.
The Oracle die is separate from the Astral dice and is not part of the Pool.
On your turn, choose one action. You may Claim from the Pool, Recast one of your dice, Shift dice in a chosen direction, Parley with another player, or Stir the Pool, while watching the current Oracle Halo.
Your goal is to build an Assembly Row of exactly four dice.
Your Assembly Row can hold up to 4 dice.
No Astral Sign can be completed without a Crown.
Crowns do not score, but they grant authority to the pattern. A row without a Crown is only a row. A row with the right Crown may become a Sign.
A valid Sign must include at least 1 Crown and cannot include 4 Crowns.
When your Assembly Row contains exactly four dice and matches the Omen, the Seal, or the Eclipse, say:
Astral Sign!
The timer stops. The table looks. The pattern is judged. For Omen, the lone non-Crown die must bear the current Oracle Halo.
A Sign is checked at the end of your turn.
Move all non-Crown dice from your completed Sign to your score pile. Each one is worth 1 point.
Return every Crown to the Celestial Pool and reroll it.
If the scored Sign was an Omen, the scorer rolls the Oracle die. On a Crown, every player rolls all Crown-up dice from their Assembly Row into the Pool, then the next player clockwise rolls the Oracle. On a Halo, that Halo becomes the new Oracle Halo and every player rolls all non-Crown row dice with any other Halo into the Pool. Then resolve Blessing in Disguise if the Oracle has left an opponent with a valid Astral Sign.
The Crown opens the way, then leaves the hand.
Each non-Crown die scores 1 point.
As players build and score, dice leave the table and the Celestial Pool may grow smaller. Oracle judgments, Crown returns, penalties, and Sacrifice can send dice back. When the Pool reaches the End Limit, the game closes.
The player with the most scored dice wins.
The End Limit depends on player count.
That is the game in its simplest form:
Read the Pool.
Watch the Oracle.
Build the Row.
Use the Crown.
Call the Sign.
Score what remains.
The rules are few. The consequences are not.
For complete Oracle, Oracle Halo, Blessing in Disguise, timing, penalties, Sacrifice, Sabotage, and endgame rules.
Every Turn, One Choice
On your turn, you do not move an army.
You touch one part of the table.
One die taken.
One die returned.
One direction turned.
One bargain offered.
One handful of fate cast back into the Pool.
Astral Assembly is built on small actions with large consequences. A Claim may complete a quiet plan. A Recast may rescue a failing row. A Shift may open a Sign or ruin one. A Parley may reveal more than it gains. A Stir may change the heavens for everyone.
Choose carefully.
The hourglass is already falling.
One Turn. One Action. One Consequence.
Take desire into your hand.
Take 1 die from the Celestial Pool and place it in your Assembly Row. You may Claim only if your Assembly Row has fewer than 4 dice.
Claim is the cleanest action, and therefore the most revealing. When you take a die, the table sees what you value: a Crown, an exact twin for Seal, a matching Shape and Dot for Eclipse, a missing non-Oracle Halo, or the current Oracle Halo. You keep the die’s top face, choose its direction as you place it, and then that direction is fixed.
A Claim says, “I have seen something.”
Return certainty to chaos.
Return 1 die from your Assembly Row to the Celestial Pool and reroll it. Then take 1 die from the Celestial Pool and place it in your Assembly Row. You may Recast only if you already have at least 1 die in your Assembly Row.
Recast is the action of correction and risk. It gives up a piece of your plan, but it also lets you reach for something better. A wise Recast can turn a failing row into a threat. A desperate Recast can tell the whole table that your plan has begun to collapse.
A Recast says, “The stars were wrong. I will ask again.”
Touch fate by one direction.
Choose one table direction. You may turn either all dice in your Assembly Row one step in that direction, or 1 die in one opponent’s Assembly Row one step in that direction. You may not Shift the same opponent on two of your turns in a row. Do not lift, spin, or inspect hidden faces before choosing. The new top face stands. If your Shift causes an opponent’s Assembly Row to form a valid Astral Sign, resolve Blessing in Disguise.
If your Shift or an Oracle resolution during your turn causes an opponent’s Assembly Row to form a valid Astral Sign, they can immediately call and score it as a Blessing in Disguise. After scoring, they also take two dice from your score pile and add them to their own. If you have fewer than two dice in your score pile, they take as many as possible. If your score pile is empty, no additional dice are taken.
Shift is a directional command. Used on your own row, it can transform every die you have committed at once. A careful player may even build a Sign in profile, hidden on the side faces of the dice, then shift the whole row together and reveal what the table failed to see. Used against an opponent, Shift can disturb their plan, but it can also crown them. A careless Shift may hand another player a Sign, your points, and the room’s admiration.
A Shift says, “Your future is not as stable as you think.”
Smile, bargain, and measure the room.
Ask another player to swap 1 die from their Assembly Row for 1 die from your Assembly Row. The timer is paused until the opponent answers. You may Parley only if both players have at least 1 die in their Assembly Rows. If both players agree, swap the chosen dice. If the other player refuses, you must choose a different action before the timer expires. If another player’s Assembly Row forms an Astral Sign because of your Parley, they may call it only on their own turn.
Parley is the social action. It is bargain, bluff, request, threat, and confession. Sometimes you Parley because you need the die. Sometimes you Parley to discover whether your opponent knows what it is worth.
A Parley says, “I know what you have. Do you know why I want it?”
Make the heavens speak again.
Reroll up to 4 dice from the Celestial Pool. This does not change your Assembly Row.
Stir the Pool is a turn action. Dice returned by an Oracle result are rolled into the Pool, but that table-wide judgment is not a Stir and does not replace anyone’s turn action.
Stir the Pool is the action of disruption. It may create opportunity, remove temptation, deny an opponent, or admit that the current table offers nothing worth taking. Unlike the Oracle’s judgment, Stir targets only the Pool and leaves every Assembly Row untouched.
A Stir says, “Let no one grow too comfortable beneath these stars.”
Choose an action to feel its pressure.
Choose Claim to gain.
Choose Recast to repair.
Choose Shift to alter.
Choose Parley to bargain.
Choose Stir to unsettle.
The five actions are simple enough to learn before the first hourglass falls.
But their meanings change with every table.
Claim when the path is clear.
Recast when the path has failed.
Shift when fate is close enough to touch.
Parley when another player holds your future.
Stir the Pool when the stars must be scattered.
A master does not merely know the actions.
A master knows when one quiet move is enough to make the whole table afraid.
In Astral Assembly, power is rarely loud. It is usually one die, moved at the perfect time.
The Law of the Table
Every noble game requires a law.
Here you will find the complete rules of Astral Assembly, from the first roll into the Celestial Pool to the final judgment of the last Sign.
Read them before your first game.
Return to them when the table disagrees.
Let them settle every Crown, Shift, Parley, Sacrifice, and false call.
The dice may fall in chaos.
The rules must not.
The official rules below are written for play, not ornament. They should be followed exactly during a match.
Consult before judgment.
No law of the table matches that search.
Assemble a 4-dice Astral Sign from the Celestial Pool.
In each Astral Sign, you score dice; each scored die is worth 1 point. The player with the most points wins.
On your turn, you manipulate dice in the shared Celestial Pool or in Assembly Rows. Your goal is to build exactly 4 dice in your Assembly Row, including at least 1 Crown, that match one of the three Astral Signs. Non-Crown dice score points. Crowns help complete signs but return to the Pool.
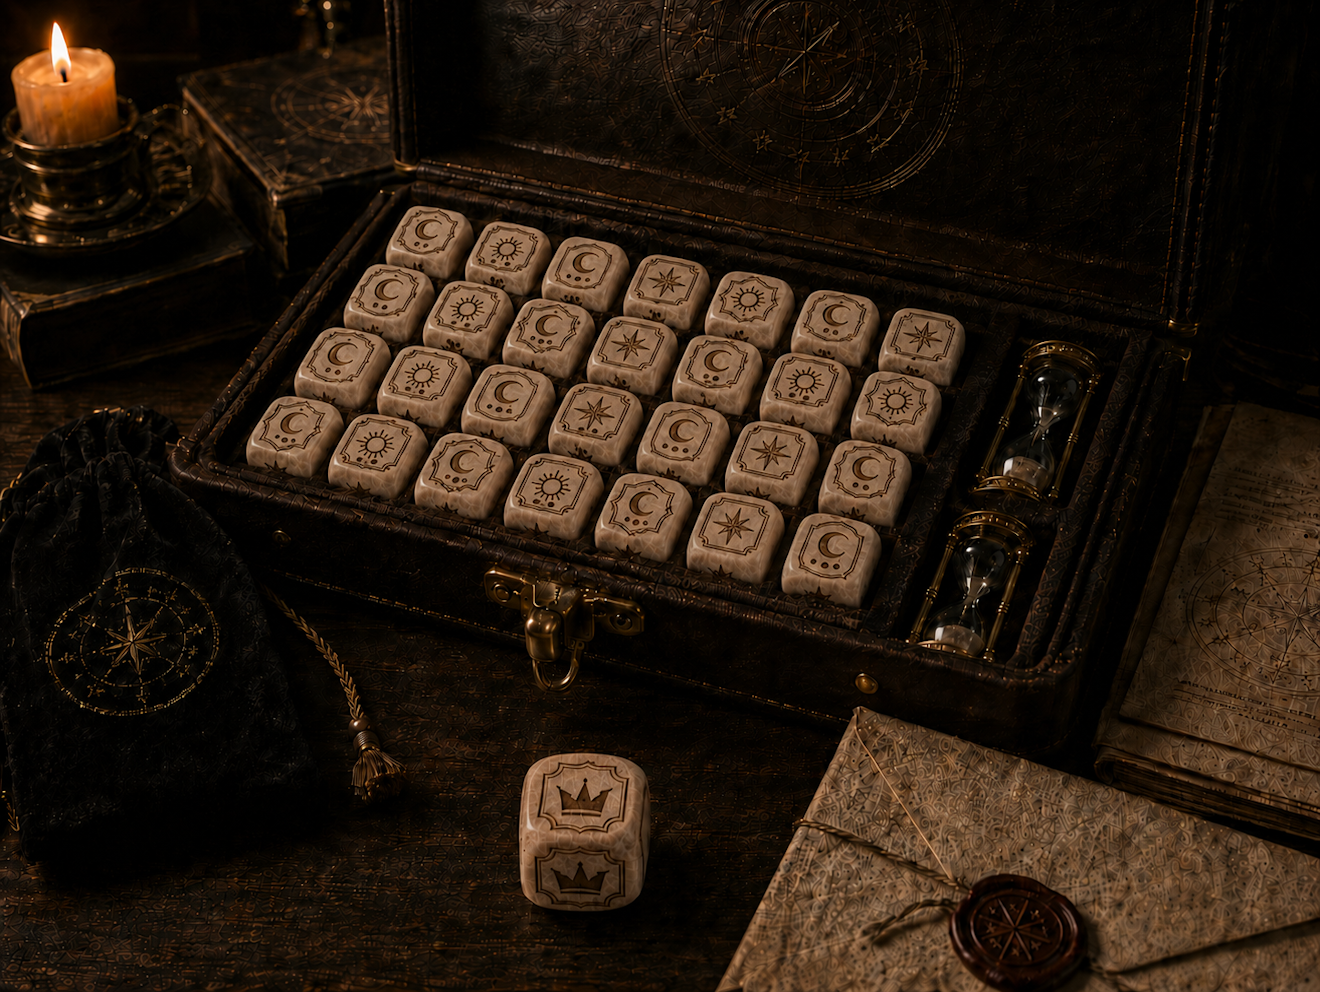
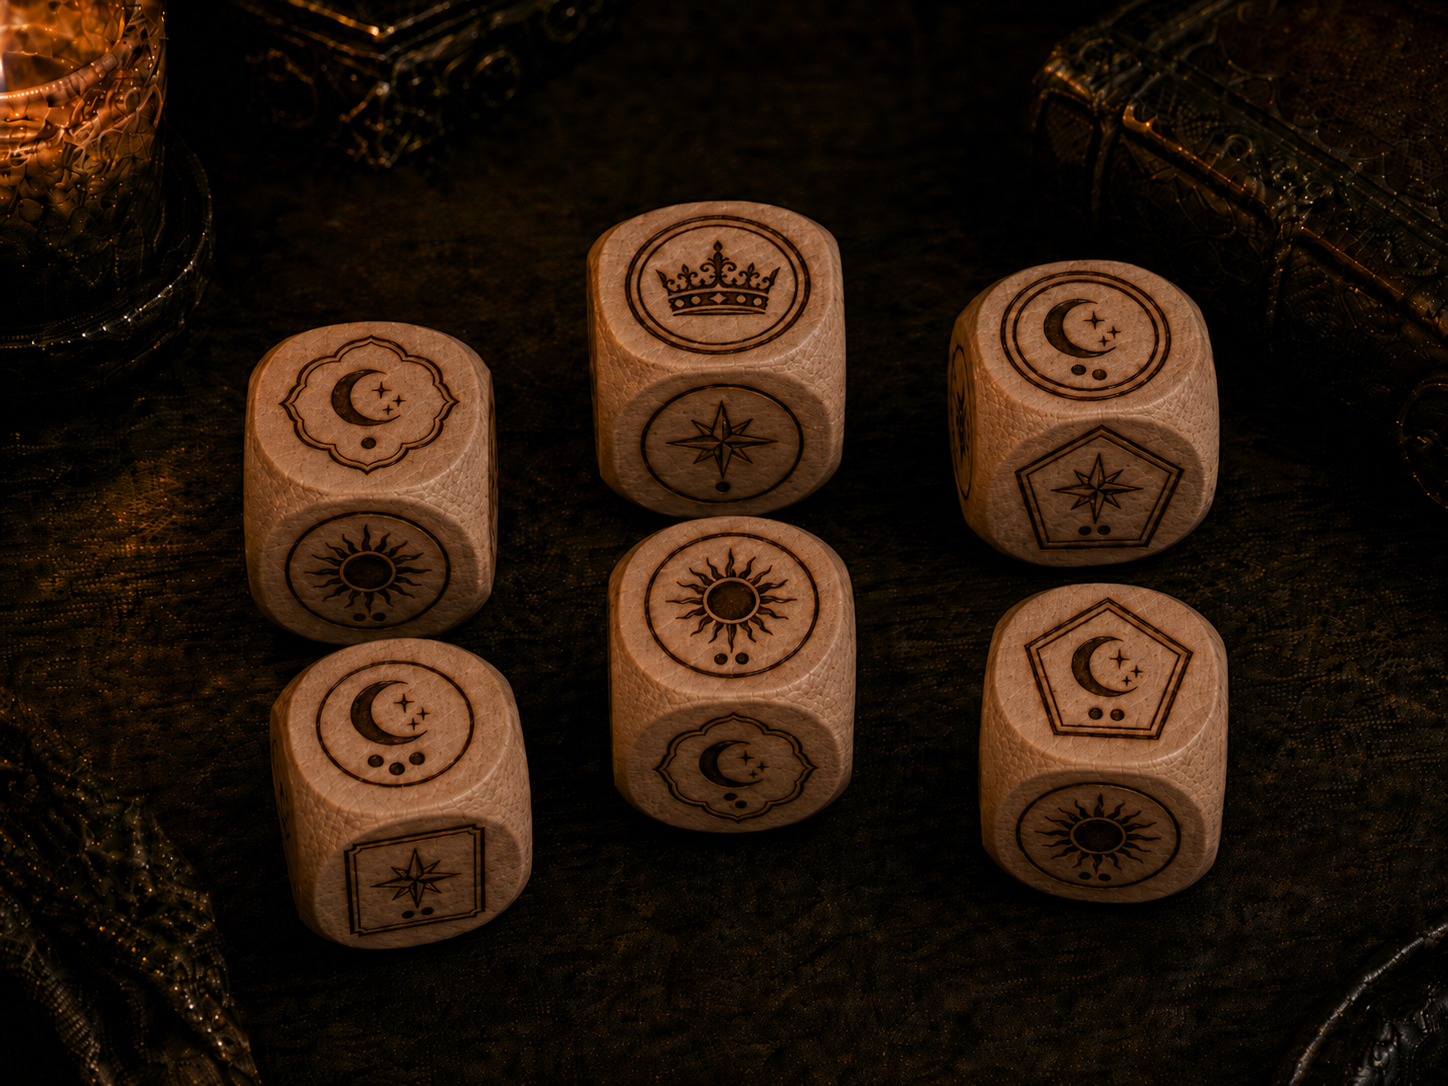
48 Astral dice + 1 Oracle die
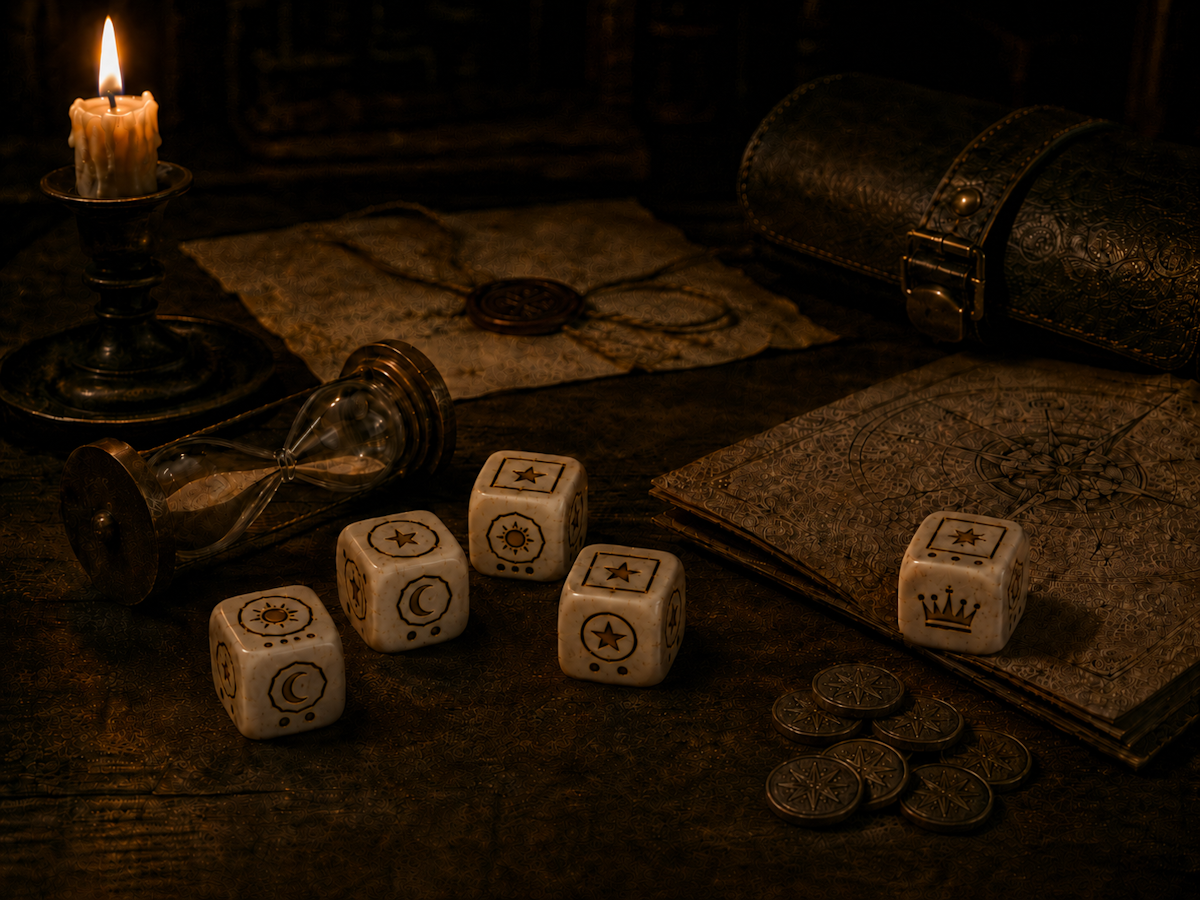
Each Astral die face has a Shape: Sun, Moon, Star, Crown.
Sun, Moon, and Star shapes also have:
The Oracle die has six faces: two Crowns and four non-Crown Halo faces, one each for Pentagon, Round, Square, and Wavy.
Choose a turn timer before the game begins, from 10 seconds to 2 minutes.
1. Each player rolls one Astral die. The player with the most dots starts. Crowns count as 0 dots. Tied players reroll until one tied player wins. The first player then rolls the Oracle die. A Crown chooses no Halo, so the next player clockwise rolls. Continue until a Halo face is rolled. That Halo is the Oracle Halo.
2. Divide the 48 Astral dice as evenly as possible among all players. Everyone rolls their dice into the middle at the same time. This creates the Celestial Pool. All dice in the Celestial Pool and in Assembly Rows are public.
3. Play clockwise.
Start the timer and choose 1 action: Claim, Recast, Shift, Parley, or Stir the Pool:
Your Assembly Row holds up to 4 dice. If it has 4 dice, you cannot Claim; choose Recast, Shift, Parley, or Stir the Pool instead. Whenever you take a die from the Celestial Pool, keep its top face unchanged. You may orient it any way, but once it touches your Assembly Row, its direction is fixed.
After your action, if your Assembly Row has 4 dice, check for an Astral Sign. If you call a valid Astral Sign, stop the timer and score it. Then you may Sacrifice 1 point. Your turn ends only after your action, any Astral Sign check, and your Sacrifice choice. If time runs out first, resolve Sabotage and do not check for an Astral Sign.
An Astral Sign is exactly 4 dice in your Assembly Row. It must include at least 1 Crown and cannot include 4 Crowns.
A valid Astral Sign must match one of these patterns:
When your Assembly Row forms a valid Astral Sign, you may score it at the end of your turn by saying, “Astral Sign!” This immediately stops the timer.
To score, move all non-Crown dice from your Assembly Row to your score pile. Return all Crowns from your Assembly Row to the Celestial Pool and reroll them. Your Assembly Row is now empty. Dice in a score pile are out of the game and cannot be claimed, recast, shifted, rerolled, bumped, or used in future Astral Signs unless a rule explicitly moves them, such as Sacrifice, penalties, False Signs, Blessing in Disguise, or tiebreakers.
If you scored an Omen, roll the Oracle die and resolve it as described in Rolling Dice, beginning with you. Continue until a Halo face sets the new Oracle Halo. After all affected Assembly Row dice have returned to the Pool, resolve Blessing in Disguise if the Oracle resolution has caused an opponent’s Assembly Row to form a valid Astral Sign.
If you call an Astral Sign and it is not valid, it is a False Sign: lose 1 point and end your turn. To lose 1 point, take 1 die from your score pile and roll it into the Celestial Pool. If your score pile is empty, you choose 1 die from your Assembly Row instead. If both are empty, there is no penalty.
At the end of your turn, after your action and any Astral Sign check, you may Sacrifice 1 point. To Sacrifice, choose 1 die from your score pile and roll it into the Celestial Pool. Sacrifice is not an action. You may do it in addition to your turn action.
If your timer reaches zero before your turn is finished, the player to your right chooses 1 die from your Assembly Row and rerolls it into the Celestial Pool.
If your Assembly Row is empty, nothing happens.
After Sabotage, your turn ends. Do not check for an Astral Sign.
If your Shift or an Oracle resolution during your turn causes an opponent’s Assembly Row to form a valid Astral Sign, they may immediately call and score it as a Blessing in Disguise. After scoring, they also take two dice from your score pile and add them to their own. If you have fewer than two dice in your score pile, they take as many as possible. If your score pile is empty, no additional dice are taken. If another player’s Assembly Row forms an Astral Sign because of your Parley, they may call it only on their own turn.
Players may view public dice from any angle, including by moving around the table, but may not block another player’s view or delay the active player. Do not touch, lift, rotate, separate, inspect, or move any die unless a rule allows it. Blocked dice stay as they are until moved legally.
If a player illegally handles a die, treat it as a False Sign. If the die’s face or position changed, the new face or position stands. Do not reset the game.
Whenever dice are rolled, roll them into the Celestial Pool. If a rolled die bumps another die and changes its face, the resulting face stands. Bumping dice is allowed. If a die leaves the table, lands cocked, lands on another die, or otherwise fails to land properly in the Celestial Pool, reroll it immediately.
Whenever the Oracle die is rolled, resolve its face before play continues. If it shows a Crown, every player simultaneously rolls every Astral die showing a Crown from their Assembly Row into the Celestial Pool. No new Oracle Halo is chosen, and the next player clockwise rolls the Oracle die.
If the Oracle die shows a Halo, that Halo becomes the Oracle Halo. Every player simultaneously rolls every non-Crown Astral die from their Assembly Row whose Halo does not match the selected Halo into the Celestial Pool. The Oracle sequence then ends.
Oracle effects apply only to dice in Assembly Rows. Dice already in the Celestial Pool and dice in score piles are not selected by the Oracle. The Oracle die is not an Astral die, is never part of the Celestial Pool, and is not used in Assembly Rows or Astral Signs.
The end of the game is triggered when the Celestial Pool has dice equal to or below the End Limit: 2 players: 12 dice, 3 players: 8 dice, and 4 or more players: 4 dice. Finish resolving the current action, Astral Sign and any Oracle sequence it causes, penalty, Sacrifice, or timeout effect. Then the game ends. Any player with 4 dice in their Assembly Row checks for one final Astral Sign.
Each scored die is worth 1 point. The player with the most points wins.
Tiebreakers: The player that scored the most Eclipses wins. If still tied, the player that scored the most Seals wins. If still tied, the player with the fewest dice remaining in Assembly Row wins. If still tied, each tied player rolls one die. The die with the most dots wins. If still tied, reroll.
Rules Appendix
The official rules above are the law of the table. These notes are optional commentary for players who want to study how strong decisions emerge inside that law.
Build Omen, Seal, or Eclipse before your rivals do. Eclipse gives the greatest reward and first tiebreak pressure. Seal gives 2 points and second tiebreak pressure. Omen gives speed and invokes a table-wide Oracle judgment that can thin every rival row and refill the Pool.
Crowns are not points, but every Sign needs them. To control Crowns is to control possibility—until the Oracle strips Crowns or incompatible Halos from every row and returns them to the market.
The timer is not only pressure. It is a weapon. A fast turn, a Stir, or a purposeful Parley can force rivals to think under sand.
The strongest players do not chase one perfect plan.
They build same Shape and Dot engines, complete Eclipse with all-different non-Oracle Halos, pivot exact twins into Seal, deny the market when threatened, and close with points plus Sign-count tiebreakers.
Know whether you are building power or buying time.
Every turn in Astral Assembly asks a question that is not written in the rules:
Are you building toward the strongest possible score, or are you taking a smaller score before the table changes?
This is the difference between Engine and Rush.
The Engine plan means building toward Eclipse. Eclipse is worth 3 points, which makes it the richest Astral Sign in the game. It asks for exactly 1 Crown and 3 non-Crowns with the same Shape, the same Dots, and Halos that are all different.
Eclipse also matters after scoring because it is the first tiebreaker. A completed Eclipse is not only 3 points. It is also tiebreaker pressure. If two players finish tied on points, the player with more Eclipses is ahead before Seals, row size, or final die rolls matter.
But Eclipse is not a general high-value plan. It is a family plan: same Shape, same Dots, different non-Oracle Halos. If that family is visible in the Pool, Engine is powerful. If it is not visible, Engine can become a trap.
The Rush plan means taking a faster score, usually Omen with the current Oracle Halo or a quick exact-twin Seal. Rush does not always give the most points, but it gives something just as important: tempo. It can bank a lead, empty a bad row, invoke an Oracle judgment that strips Crowns or incompatible Halos from rival rows, punish a slow table, or secure the ending before another player finishes a larger Sign.
A beginner asks:
Can I make a Sign?
An expert asks:
Is this Sign worth the time it will cost me?
Builds toward Eclipse.
Highest scoring ceiling.
Needs clean structure.
Best early when the Pool gives time.
Scores sooner.
Uses current-Halo Omen or exact-twin Seal.
Resets awkward rows.
Best late or when tempo matters.
Eclipse is the most valuable Sign, but it is also the most demanding.
A player who always chases Eclipse may build elegant rows that never score. They wait for the perfect third non-Crown. They protect a beautiful idea. They imagine the 3 points they deserve. Then another player scores Seal twice, or the Celestial Pool shifts, or the game ends before the plan becomes real.
A player who always rushes is also in danger. Omen can be fast, but it scores only 1 point and only works with the current Oracle Halo. A player who takes every small score may look busy while slowly falling behind players who complete stronger Signs.
Omen is not simply three Crowns plus any non-Crown. A Crown-heavy row is only threatening if the non-Crown matches the current Oracle Halo. That makes Omen tactical: sometimes it is the fastest score on the table, and sometimes it is just three Crowns waiting under the wrong sky.
The strongest player is not loyal to Eclipse.
The strongest player is not loyal to Omen.
The strongest player is loyal to timing.
Early in the game, there is usually enough space to scout an Eclipse engine. In the middle of the game, Seal becomes the natural pivot only when the Pool offers an exact twin and you can find a second Crown. Near the end, Omen may become powerful because 1 point, a cleared row, a table-wide Oracle judgment, or a faster ending may matter more than a perfect 3-point plan.
The table decides what kind of player you must become.
The Engine plan begins with structure.
A clean Eclipse pair means the dice agree in Shape and Dots while leaving room for different non-Oracle Halos. If the next die can continue that Shape/Dot line with an unused non-Oracle Halo, the row becomes dangerous.
Example Engine setup
This row is not a Sign yet, but it is promising only if the non-Crowns share Shape and Dots. To complete Eclipse, you need a third non-Crown with that same Shape and Dot value, but with a Halo not already represented.
You are not waiting for any useful die. You are waiting for a narrow family: the same Shape, the same Dot value, and a Halo you do not already have.
That is what makes a good engine strong. It leaves more than one missing non-Oracle Halo live instead of depending on a single miracle die.
A bad Engine plan waits for a miracle.
A good Engine plan creates several possible futures.
Engine is strongest when the Pool gives you room to breathe.
If your row has 1 Crown and 2 clean non-Crowns, the table should begin to worry. You are not scoring yet, but you are building toward the most valuable Sign.
The most dangerous phrase in Astral Assembly is: one more turn.
Sometimes one more turn is correct. Often, it is vanity wearing a strategist’s mask.
The Rush plan is not mindless speed. It is the decision to take immediate value because waiting is worse.
Rush usually appears in two forms: current-Halo Omen and exact-twin Seal.
Omen is a small score with a large table effect, but only when your non-Crown matches the current Oracle Halo. It scores only 1 point, then places every Assembly Row under the Oracle. A Crown result returns every Crown-up row die to the Pool and passes the Oracle clockwise. A Halo result sets the new Oracle Halo and returns every non-Crown row die with another Halo. This can dismantle Eclipse engines, erase stored Crowns, preserve matching-Halo Seal structure, or complete an opponent’s Omen as a Blessing in Disguise.
Seal is the other Rush score, but it is not a loose backup. It only appears when you can pair two Crowns with two identical non-Crowns: same Shape, same Dots, and same Halo. Treat Seal as an opportunity the Pool gives you, not a plan you can force every game.
Rush example: Omen, assuming Round is the current Oracle Halo
Rush is not about being impatient. Rush is about understanding that points already scored are safer than points still imagined.
A good Rush feels practical, not desperate.
The table is changing. I will take what can be taken.
Rush is weak when it becomes your default. If you take Omen early just because it is available, you may reset your row for only 1 point while another player quietly builds toward Eclipse.
Rush is also weak when it ignores the board. If you can complete Eclipse soon, taking Omen may throw away a winning position.
Do not rush because you are nervous. Rush because the table, score, Pool, and timer all say that waiting is more dangerous.
Your Assembly Row contains: Crown; Sun, Round, 2; Sun, Square, 2. This is a good Engine position.
You are looking for a non-Crown with the same Shape and Dots as your engine, but with a non-Oracle Halo not already in the row. If the Pool contains such a die, continue the Engine plan. Claim it if possible. Protect the row. Prepare to score Eclipse.
Next, imagine the Pool does not contain that missing non-Oracle Halo. Instead, it contains a Crown and an exact twin of one of your non-Crowns. The board may be offering Seal rather than Eclipse.
You may not have a clean Eclipse soon. But if you can create exact twins with a second Crown, Seal may become available. You may need to stop dreaming about 3 points and take 2.
Seal can also matter in tied-score games. Seal scores 2 points, and if Eclipse counts are tied, Seals are the next tiebreaker. If the final score may be close, a Seal can be worth more than its raw points suggest.
Finally, imagine the Pool is almost at the End Limit, and you already have 3 Crowns and a non-Crown with the current Oracle Halo. That is Omen. Only 1 point, yes, but it also clears your row and invokes the Oracle against every rival Assembly Row. The resulting returns may destroy a larger plan, refill the Pool, or secure the lead before another player gets one more turn.
Scout Eclipse.
Pivot to exact-twin Seal.
Rush Omen only when the Halo agrees.
Beginners often think the highest-value Sign is always the best plan. That is false.
Eclipse is the best completed Sign, but it is not always the best decision. A 3-point Sign that never scores is worth nothing. A 2-point Seal scored at the right moment can win the table. A 1-point Omen at the edge of the endgame can be more valuable than a perfect Eclipse that never arrives.
The beginner sees the reward.
The expert sees the cost of waiting.
Engine players look patient, but they become obvious.
If you sit with 1 Crown and 2 clean non-Crowns, opponents will begin scanning the Pool for your finisher. They may Claim it before you. They may Stir it away. They may Shift your row. They may Parley to extract value from you.
A Rush plan can be harder to stop because it gives the table less time to react. Sometimes the best strategy is not the one with the highest ceiling. It is the one your opponents notice too late.
Can I complete Eclipse this turn or soon?
If not, can I make an exact-twin Seal?
If not, do I have a current-Halo Omen?
If scores may tie, do Eclipse or Seal tiebreakers matter?
If the Eclipse family is real, build it. If the family is fading, pivot. If the game is closing and the Halo agrees, rush.
When an Eclipse line duplicates a Halo, the failed 3-point plan may become a 2-point seal.
In Astral Assembly, ambition is useful only while it remains alive.
Many players begin correctly. They build toward Eclipse, the richest Sign in the game. They claim 1 Crown. They collect clean non-Crowns. They watch the Celestial Pool for the perfect third piece.
Then the table refuses them.
This is where weaker players become stubborn. The expert does something different.
The expert notices when the row has stopped being an Eclipse line and has become a Seal line.
Seal is the bridge between patience and pressure. It scores 2 points, requires fewer non-Crowns than Eclipse, and can often be completed by claiming a second Crown at exactly the right moment.
A Seal Pivot is not surrender.
It is the art of turning unfinished ambition into scored authority.
A valid Seal contains 2 Crowns and 2 non-Crown dice.
The two non-Crown dice must be exact twins: same Shape, same Halo, and the same number of Dots.
This makes Seal easier than Eclipse in one way and stricter in another. It is easier because it needs only 2 non-Crowns instead of 3. It is stricter because those 2 non-Crowns must match exactly.
A Seal does not ask for much, but it asks precisely.
This is the key difference between Seal and Eclipse: Eclipse wants matching Shape and Dots with different non-Oracle Halos. Seal wants matching Shape, Dots, and Halo. A duplicate Halo or Oracle Halo kills the Eclipse line, but a duplicate Halo may awaken the Seal line.
Your non-Crowns are exact twins.
They share Shape, Halo, and Dots.
A second Crown is visible.
Eclipse is stalled.
Tempo matters.
Your non-Crowns differ in any feature.
Your Eclipse finisher is visible.
You need a 3-point swing.
The second Crown clogs your row.
Claiming Crown gives opponents a better Pool.
You are pivoting from fear, not board logic.
Seal is the most important mid-game Sign.
Omen is low value, Omen-Halo-dependent, and can change the table’s target after it scores. Eclipse is powerful, but demanding. Seal is the practical center.
A player who understands Seal can escape dead rows. They can recognize when an Eclipse plan has broken into a duplicate-Halo pattern. They can punish a Pool with visible Crowns. They can score before opponents expect them to.
Seal also matters beyond its 2 points. If players tie on score and Eclipses, the player with more Seals wins the next tiebreaker. A Seal is not just a smaller score; it can become the deciding record of the game.
One turn, a player seems to have an unfinished Eclipse engine.
The next turn, they claim a second Crown, say “Astral Sign,” and bank 2 points.
That is the strength of the pivot. It changes the question from “How do I complete the perfect Sign?” to “What is the best Sign the table is offering?”
The cleanest Seal Pivot begins when an unfinished row already holds exact-twin non-Crowns.
Seal Pivot: before and after
Before the pivot
Completed Seal
This row has 1 Crown and 2 useful non-Crowns because those non-Crowns are exact twins. It is not a clean Eclipse route, because Eclipse needs different non-Oracle Halos. The Seal pivot appears when two non-Crowns match in Shape, Halo, and Dots, then a second Crown appears.
If your two non-Crowns have the same Shape and Dots but different non-Oracle Halos, they point toward Eclipse. If they are exact twins, they point toward Seal. The second Crown is what turns that duplicate into points.
Look for Seal when your row has 1 Crown and 2 identical non-Crowns. Same Shape, same Halo, same Dots is the cleanest Seal signal.
The moment you see this structure, your eyes should start checking the Pool for a Crown.
Seal is especially strong when the table thinks you are still chasing Eclipse, but your duplicate Halo has quietly created a different threat.
Seal is better than Eclipse when Eclipse is imaginary, especially after your row has duplicated a Halo.
A real Seal is worth more than a theoretical Eclipse. If the Pool does not contain a useful third non-Crown, your 3-point dream may only be decoration.
Seal is also better when tempo matters. If another player is one turn away from scoring Eclipse, taking Seal immediately may prevent you from falling too far behind. If the game is near the end, 2 immediate points may matter more than 3 points later.
It is also better when a Seal may protect a tiebreaker position. If you cannot catch someone on Eclipses, banking Seals may be the next-best way to win a tied game.
Seal is not the biggest score. It is the score that often arrives in time.
Do not pivot to Seal automatically. Seal is wrong when your Eclipse finisher is visible and likely to remain available until your turn.
Seal is wrong when claiming a second Crown lets an opponent take an even better die. Seal is wrong when your non-Crowns are not exact twins. Seal is wrong when you are far behind and need a larger swing, especially if Eclipse is still realistic.
The point is not to prefer Seal over Eclipse. The point is to know when Eclipse has stopped being real.
Your Assembly Row contains Crown; Sun, Round, 2; Sun, Round, 2. The Pool contains Crown; Star, Pentagon, 4; Moon, Wavy, 1; Sun, Square, 3.
You were hoping for Eclipse, but the two Suns duplicate the Round Halo. That means the row is not a clean Eclipse line. The Crown is available.
Claiming the Crown gives you an immediate Seal for 2 points. This is a good pivot. You bank points, clear your row, return the Crowns to the Pool, and deny the table time to interfere.
Your Assembly Row contains Crown; Sun, Round, 1; Sun, Square, 1. The Pool contains Sun, Pentagon, 1 and Crown.
Here, the Sun, Pentagon, 1 may continue a strong Eclipse path with same Shape and same Dots plus an unused Halo. If you claim the Crown instead, you do not have Seal, because your non-Crowns are not exact twins.
Not a Seal: the non-Crowns are not exact twins.
You have not pivoted. You have clogged your row. Seal Pivot is not “claim a second Crown.” Seal Pivot is “claim a second Crown when your non-Crowns already satisfy Seal.”
Matching Dots matter, but they are not enough for Seal. When choosing your early non-Crowns, watch Shape, Halo, and Dots together.
Sun, Round, 2 beside Sun, Round, 2 supports Seal immediately if you find a second Crown.
Sun, Round, 2 beside Sun, Square, 2 supports Eclipse if neither Halo is the Oracle Halo and you later find a Sun with a third non-Oracle Halo and 2 Dots.
Exact twins whisper Seal.
Same Shape and Dots with different non-Oracle Halos whisper Eclipse.
The Pool decides which whisper becomes a command.
A strong Seal setup should make other players nervous. If you have Crown; Sun, Round, 2; Sun, Round, 2, then every Crown in the Pool becomes dangerous.
Opponents may Claim it, Stir it away, Shift your row, or rush an Omen that submits the setup to the Oracle. A Crown result removes your Crown; a Halo other than Round removes both twins. This means Seal Pivot is also a threat posture. Even before you score, you change what other players must care about.
A visible Seal threat can force opponents to waste actions defending against you. That is value, even before points.
Seal becomes especially strong when the Pool has extra Crowns. If the Pool is Crown-rich, players may assume Crowns are easy to get, but a Seal player can turn that abundance into immediate points.
The important question is: who can use the next Crown fastest?
If the answer is you, Seal is live. If the answer is an opponent, you may need to deny them first. Crown supply is never neutral. Every Crown either opens a door for you or for someone else.
Scoring a Seal does more than give 2 points. It also empties your Assembly Row.
The two non-Crowns go to your score pile. The two Crowns return to the Celestial Pool and are rerolled. Your row becomes empty.
This reset has strategic value. It frees you from a row that may have become too obvious or too fragile. It lets you begin another plan. It also reduces your row size if score, Eclipses, and Seals remain tied.
A scored Seal is points plus freedom.
Beginners often miss Seal because they look for more Crowns for Omen, more non-Crowns for Eclipse, and obvious completed Signs.
They do not notice that two exact-twin non-Crowns are already a Seal structure.
The beginner sees: “I have only three dice.”
The expert sees: “I am one Crown away from 2 points.”
To pivot into Seal, ask:
Same Shape?
Same Halo?
Same Dots?
Second Crown available?
If all four are yes, the Seal is awake.
If the Crown is available and your duplicate-Halo row is not about to become a real Eclipse line, take the Seal.
Crowns do not score, but they decide who can.
The first lesson of Astral Assembly is that Crowns do not score.
The deeper lesson is that no one scores without them.
Every valid Astral Sign needs at least 1 Crown. Omen needs 3. Seal needs 2. Eclipse needs 1. A row with perfect Suns, Moons, Stars, Halos, and Dots means nothing if it has no Crown.
They are not points.
They are permission.
Crown Starvation is the strategy of claiming or holding Crowns when they create a real scoring path for you or deny a real scoring path from someone else.
You are not collecting treasure. You are controlling access to the throne.
Crown Starvation means using Crowns as one strategic bottleneck. Since every Astral Sign requires at least 1 Crown, Crowns open the door to scoring, but the Sign patterns also demand exact non-crown structure.
When you Claim a useful Crown, that door closes for everyone else and opens for you. This matters most when Crowns are scarce or when a player already has the non-Crown dice needed for a live Sign.
Crown Starvation is not always obvious. Sometimes it looks like you are simply building your own row. But if your Claim also prevents the next player from completing a Sign, you have gained twice: you improved your position and weakened theirs.
That is efficient play.
Crowns behave differently from non-Crowns. Non-Crown dice become points when scored. They leave play and sit in the score pile.
Crowns return to the Celestial Pool when a Sign scores. They also return when the Oracle shows a Crown: every Crown-up die in every Assembly Row is rolled back into circulation before the Oracle passes clockwise.
This means Crowns are temporary power. They move through the game like offices, titles, and favors at court. A player may hold them for a while, but they rarely keep them forever.
The key question is not: “How many Crowns can I get?”
The real question is: “Who can use the next Crown best?”
If the answer is you, Claim it. If the answer is an opponent, consider denying it. If the answer is no one, it may be safe to leave it.
With 48 Astral dice, do not assume Crowns are scarce or plentiful by default. Judge the Crown economy by the visible Pool, the Assembly Rows, and how many Crowns are locked in rows at this moment.
The Sign patterns make random Crown hoarding weak. Omen needs the current Oracle Halo, Seal needs exact twins, and Eclipse needs matching Shape and Dots with three different non-Oracle Halos. A Crown matters most when it connects to one of those real patterns.
Cannot score yet.
Best Eclipse setup, especially with matching Shape and Dots.
Strong exact-twin Seal setup if the matching non-Crowns are available.
Omen setup only if you can use the current Oracle Halo.
Invalid and dangerous.
Your Crown count tells you what kind of row you are building. With 1 Crown, you are looking for 3 non-Crowns with the same Shape, the same Dots, three different non-Oracle Halos, and no Oracle Halo. With 2 Crowns, you threaten Seal only when you have or can reach exact-twin non-Crowns, while also reducing available Crowns in the Pool. With 3 Crowns, you point toward Omen only if you already have, or can soon claim, a non-Crown die with the current Oracle Halo. With 4 Crowns, you have filled the room with authority and left yourself no legal Sign.
The Oracle makes 3-Crown rows especially volatile. Three Crowns threaten Omen only when the fourth die has the current Oracle Halo. If another Omen invokes the Oracle first, a Crown result removes all three Crowns from your row. A different Halo removes your non-Crown. Only an immediate roll of your non-Crown’s Halo preserves the row and may complete your Omen as a Blessing in Disguise.
The Pool has few Crowns.
Opponents have no Crowns.
You can threaten an exact-twin Seal.
You already see a non-Crown die with the current Oracle Halo.
You are leading and want to slow scoring.
The next player needs a Crown.
The Crown helps you and denies someone else.
You are behind and need Eclipse points or Eclipse tiebreaker strength.
You already have 3 Crowns but no Oracle Halo path.
Your row becomes clogged.
Opponents already have Crowns.
You pass up an obvious finisher.
You cannot convert the Crown soon.
You are blocking your own Eclipse tiebreaker chances.
Two Crowns can create pressure in both directions. They help you when they point toward an exact-twin Seal. They hurt opponents when the table is short on usable Crowns.
A player with 2 Crowns and one useful non-Crown is not finished, but they are dangerous only if an exact twin exists or can be created. A player with 2 Crowns and two exact-twin non-Crowns is immediately threatening Seal.
Crown Starvation pressure
Assembly Row
Celestial Pool
The table must respond. They may Claim the exact twin you need, Stir the Pool, Shift your row, or rush their own score before you finish. All of that is value.
A good Crown Starvation position does not just score. It changes what everyone else is forced to think about.
Crown Starvation is strongest when it does two things at once. A bad Crown Claim only helps you a little. A good Crown Claim helps you and hurts the table.
The beginner sees a Crown and thinks: “I should take it because Crowns are important.”
The expert asks: “What does taking this Crown do to the table?”
If the answer is “not much,” it may not be worth your action.
The Pool contains Crown, Crown, Moon Pentagon 1, Star Wavy 3, and Moon Square 4. Your Assembly Row contains Moon, Pentagon, 1. No opponent has a Crown yet.
You Claim a Crown. On your next turn, another Crown is still available. You Claim it. Now your row is Crown, Crown, Moon, Pentagon, 1.
This is not a Sign yet, but it is pressure. If the matching Moon, Pentagon, 1 remains available, you can Claim it later and score Seal. At the same time, opponents are still looking for their first Crown.
You have not scored yet, but you have slowed the court.
Your Assembly Row contains Crown, Crown, Crown. The current Oracle Halo is Pentagon. The Pool contains Star Wavy 2, Sun Square 4, Moon Round 1, and Crown. You Claim the fourth Crown.
Invalid: four Crowns cannot form an Astral Sign.
This is not a valid Sign. It cannot score. You cannot Claim more dice because your row is full. You must Recast, Shift, Parley, or Stir to escape.
You did not starve the table. You trapped yourself.
Seal is the reason Crown Starvation becomes more than denial. A player with 2 Crowns is always asking whether two non-Crowns can match exactly: same Shape, same Dots, and same Halo.
A Sun, Round, 2 is not just a die. Another Sun, Round, 2 in the Pool may become the exact piece that turns your Crown control into 2 points.
With 2 Crowns, exact matches become more valuable. You are asking whether the table is offering Seal.
Three Crowns point toward Omen only when you can pair them with a non-Crown die showing the current Oracle Halo. Omen is low-value, but its tactical purpose is sharp because scoring it changes the Oracle Halo.
Be careful: Omen does not help the first two tiebreakers. Eclipses break ties first, then Seals. If you score mostly Omens, you may have points but weak tiebreaker position.
If you already have 3 Crowns, do not pretend you are building a rich long-term structure. You are either preparing to score Omen or you need to convert the row quickly, before another Omen gives the Oracle a chance to scatter it.
A Crown is authority.
Three Crowns with no plan become bureaucracy.
The tiebreakers make Crown choices more important. Eclipses beat Seals in ties, and Seals beat leftover row position. Omens score points, but they do not help either of the first two tiebreakers.
This means 3-Crown Omen play can protect a lead, but it can also leave you fragile if the score is tied. A 1-Crown Eclipse plan may be better when the game looks close. A 2-Crown Seal plan is useful, but it sits below Eclipse in tie strength.
Starve the table, but do not starve your own tiebreakers.
In a 2-player game, Crown Starvation is direct and brutal. Every Crown you take is denied to exactly one opponent.
In a 3-player game, Crown Starvation becomes political. Denying a Crown from one opponent may accidentally help another.
In a 4+ player game, Crown Starvation becomes harder to control. More players means more Claims, more Parley, and more chances that Crowns return to the Pool after scoring.
The larger the table, the more Starvation becomes temporary. Use the window before it closes.
If another player is starving Crowns, do not simply complain about bad luck. Respond.
Crown Starvation is strong, but it is not unbeatable. It creates pressure. Pressure invites response.
Every Crown you hold occupies a slot in your Assembly Row. Your row can hold only 4 dice. That means every Crown reduces the number of non-Crown dice you can hold.
With 1 Crown, you can still hold 3 scoring dice for Eclipse. With 2 Crowns, you can hold only 2 scoring dice for Seal. With 3 Crowns, you can hold only 1 scoring die for Omen.
The more Crowns you hold, the lower your scoring ceiling becomes. This is why Starvation must eventually become conversion. A Crown result on the Oracle may free those slots, but it returns your leverage to the Pool without giving you a point.
Also watch the score piles. Non-Crown dice that score leave the game, so exact twins and same-Shape, same-Dots Eclipse families can become harder to find as the game develops.
Control without conversion is vanity.
Beginners often make one of two opposite mistakes. Some ignore Crowns because Crowns do not score. Others overvalue Crowns and collect too many.
Both mistakes come from misunderstanding the same truth: Crowns are not points, but points need Crowns.
The expert does not worship Crowns.
The expert uses them.
Before claiming a Crown, ask:
Does it help my Sign?
Does it deny an opponent?
Do I still have room for scoring dice?
Can I convert it soon?
If I am holding 3 Crowns, can I reach a non-Crown die with the current Oracle Halo?
If the game is close, am I giving up an Eclipse or Seal tiebreaker?
If the Crown gives you a path and blocks someone else, take it.
If the Crown fills your row without a plan, leave it.
Every die in your row should have a job.
A weak player fills their Assembly Row.
A strong player builds it.
This is the difference between collecting dice and designing a row. Your Assembly Row has only four spaces. Every space matters. Every die you Claim changes what Signs are possible, what future dice become useful, and how easily opponents can read or disrupt your plan.
A random row may look promising because it contains beautiful dice. A clean row is promising because its dice cooperate.
Clean Row Architecture is the skill of building rows where every die supports a possible Omen, Seal, or Eclipse. It means matching Shape and Dots intentionally, watching whether Halos point toward Seal or Eclipse, respecting the current Oracle Halo, and knowing which future you are actually building.
The novice asks:
Is this die good?
The expert asks:
Is this die good with the dice I already have?
A clean row is a row that keeps scoring paths open.
For Seal, your two non-Crowns must be exact twins: same Shape, same Halo, same Dots. For Eclipse, your three non-Crowns must have the same Shape and same Dots, with Halos that are all different and no Oracle Halo. For Omen, your single non-Crown must have the current Oracle Halo.
This means non-Crown dice do not stand alone. They must be judged by relationship. For Seal and Eclipse, a die is useful when it matches the Shape and Dots your row is building. For Omen, a die is useful when it matches the current Oracle Halo. A repeated Halo may be perfect for Seal, but it blocks Eclipse unless your path changes or the Halo is repaired.
Clean architecture is the art of choosing dice that leave a real scoring future open.
Omen is the Crown-heavy path. Unlike Seal and Eclipse, it does not care about the non-Crown die’s Shape or Dots. It cares about the current Oracle Halo.
If the Oracle Halo is Round, then any non-Crown die with a Round Halo can complete Omen with three Crowns. A Sun Round 1, Moon Round 4, and Star Round 2 are all useful for the same Omen plan.
This makes Omen-Halo dice temporarily valuable. But Omen scores only one die, and every Omen ends with a table-wide Oracle judgment, so an Omen plan is tactical, narrow, and unstable.
A clean Omen row is not built around Shape and Dots. It is built around Crowns and the current Oracle Halo.
Most failed rows fail before the player notices. A player Claims a useful-looking die, then another, then a Crown, then a fourth die. Only at the moment of checking do they discover the row cannot score because the non-Crowns do not form exact twins for Seal or a same-Shape, same-Dot, all-different non-Oracle-Halo line for Eclipse.
By then, the row is full. Now the player must spend actions fixing what should never have been built.
Every action spent repairing a bad row is an action not spent scoring, denying, or pressuring opponents. Recast can fix mistakes, but expert players prefer not to create those mistakes in the first place.
A clean row does not guarantee a Sign.
It guarantees that your next useful die remains useful.
The most important structure in the game is not a completed Sign. It is the first purposeful foundation: exact twins for Seal, same Shape and same Dots with different non-Oracle Halos for Eclipse, or two Crowns with a current-Omen-Halo non-Crown for Omen.
Clean Eclipse foundation
This foundation supports Eclipse only when the non-Crowns share Shape and Dots while their Halos can become all different and avoid the Oracle Halo.
Another clean pair, Sun Round 2 with Sun Round 2, points toward Seal: add a second Crown and the exact twins can score.
Each route is clean only when the dice already point toward a real Sign. Seal wants exact twins. Eclipse wants one Shape and one Dot value across different non-Oracle Halos. Omen wants Crowns and the current Oracle Halo.
Before you trust a foundation, ask:
Do they make exact twins for Seal?
Do they share Shape and Dots for Eclipse?
Do their Halos support the route, and does an Eclipse route avoid the Oracle Halo?
If I am building Omen, does the non-Crown match the current Oracle Halo?
If the answers point to a real Sign, you have architecture. If not, you have decoration.
A wrong Shape can quietly destroy your scoring path. Same Shape is required among the non-Crowns for both Seal and Eclipse.
Dirty row: wrong Shape for the chosen route.
At first glance, mixed Shapes may look varied and useful. But Seal and Eclipse both demand sameness of Shape among their non-Crowns. One wrong Shape must eventually be Recast, Shifted, swapped, or ignored.
Variety of Shape is not a scoring virtue.
A repeated Halo is useful for Seal if the dice are exact twins, but it blocks Eclipse unless the row changes path.
Route warning: repeated Halo blocks Eclipse but may support Seal.
If the dice are exact twins, the repeated Halo is a Seal foundation. If you are chasing Eclipse, however, three non-Crowns need all-different non-Oracle Halos.
The Halo is not decoration.
It tells you whether the row wants Seal, Eclipse, or Omen.
Dots do not choose the route by themselves. Seal and Eclipse both need matching Dots across their non-Crowns. Your Shape and Dot value form the anchor. Your Halos and Crown count decide the route.
If your row is building around Sun 2, then Sun Round 2, Sun Square 2, and Sun Pentagon 2 can point toward Eclipse only when none of those Halos is the Oracle Halo. Sun Round 2 and Sun Round 2 point toward Seal. But Sun Round 2 and Sun Square 3 do not share the same anchor, so the row is broken.
Exact twins point toward Seal.
Same Shape and Dots with different non-Oracle Halos point toward Eclipse.
If the Dots do not match across the non-Crowns, Seal and Eclipse both fail.
A strong early Assembly Row often looks like this: Crown, Non-Crown A, Non-Crown B, Empty slot.
A Crown-heavy Omen row can also be clean: Crown, Crown, Omen-Halo non-Crown, Empty slot. That row is narrower, but dangerous. It only needs one more Crown to score.
Crowns create pressure. Non-Crowns give direction. The empty slot preserves flexibility.
Crown, Sun Round 2, Sun Square 2 says: “I am building toward Eclipse. I need a Sun with a third Halo and 2 Dots.” Crown, Sun Round 2, Sun Round 2 says: “I can pivot to Seal if I find a second Crown.”
Crown, Crown, Sun Round 2 says something different if Round is the Oracle Halo: “I am one Crown away from Omen.” If another Omen is scored first, the Oracle may remove the Crowns, cast out the Sun, or preserve the entire route only by selecting Round immediately.
The best early rows say something clearly. A row that says nothing will usually score nothing.
Crown
Sun, Round, 2
Sun, Square, 2
Empty slot
Why it works: Same Shape. Same Dots. Halos can become all different for Eclipse.
Crown
Sun, Round, 1
Sun, Square, 3
Empty slot
Why it fails: The Dots do not match. The row needs repair before it can become Seal or Eclipse.
The point of clean architecture is not to lock yourself into one plan too early. The point is to create useful choices.
Crown, Sun Round 2, Sun Square 2 has an Eclipse future if the table offers a Sun with a third non-Oracle Halo and 2 Dots, and the existing Halos are not the Oracle Halo. Crown, Sun Round 2, Sun Round 2 has a Seal future if the table offers a second Crown.
Now consider Crown, Sun Round 2, Moon Square 2. It looks similar, but the wrong Shape blocks both Seal and Eclipse cooperation.
A clean row can pivot.
A dirty row must be repaired.
Eclipse deserves extra respect. It scores three dice and wins the first tiebreaker. Seal scores two dice and wins the second tiebreaker. Omen scores only one die, but can be fast when the Crown structure is already there. If Eclipse and Seal are equally available, the cleaner Eclipse route is usually the stronger long-term plan.
Clean Row Architecture changes how you scan the Celestial Pool. A beginner scans for attractive dice. An expert scans for compatible dice.
If your row has Crown, Sun Round 2, Sun Square 2, you are looking for Shape: Sun; Dots: 2; and a non-Oracle Halo not already used, such as Pentagon or Wavy when they are not the current Oracle Halo.
That clear search makes you faster under the timer and helps you identify when the Pool has stopped helping you.
Also scan for the current Oracle Halo. An Omen-Halo die may look ordinary to everyone else, but if a player has two or three Crowns, it may be the most dangerous die in the Pool.
Once you understand your own row architecture, you can read opponents better. If an opponent has Crown, Sun Round 2, Sun Square 2, you know they want a Sun with a missing non-Oracle Halo and 2 Dots.
If that non-Oracle die appears in the Pool, you may need to Claim it, Stir it away, or force them into a slower path. The same is true for current Omen-Halo dice when an opponent is Crown-heavy.
You are not only reading your row. You are reading every row as unfinished architecture.
Shift makes architecture unstable. Your row may be clean at this moment, but a Shift can turn one die into the wrong Shape, the wrong Halo for your route, the wrong Dot value, or an unexpected Crown.
When Shifting your own row, all dice in your Assembly Row turn one step in the same chosen table direction. This can save a broken row, but it can also ruin a clean one.
When Shifting an opponent, you turn only one die in their row. This can damage their architecture, but it can also create a Blessing in Disguise if you accidentally complete their Sign. An Oracle resolution during your turn can do the same while casting incompatible dice out of every row.
An Omen does not merely change which Halo matters. It tests every row. A Crown result removes every Crown-up row die. A Halo result preserves only non-Crown row dice bearing that Halo and returns all other non-Crowns to the Pool.
Eclipse architecture is the most exposed because it requires three different non-Oracle Halos. No complete Eclipse family can survive a Halo judgment intact: at most one of its non-Crowns matches the selected Halo, and that matching die becomes forbidden for Eclipse. Exact Seal twins survive a Halo result only when their shared Halo is selected and no earlier Crown result has removed their Crowns. A 3-Crown Omen row survives only when its lone non-Crown’s Halo is the first result.
Build cleanly, but count who can call the Oracle before your structure scores.
Recast is the tool that repairs bad architecture. Use Recast when a die has lost its job.
Do not Recast randomly. Recast the die that prevents the largest number of future Signs.
Parley is often strongest when you can explain architecture without revealing too much. You might offer: “That die helps my row, but this one gives you a cleaner pair.”
You can also use Parley to escape bad architecture. But Parley has a cost: it reveals what you care about. A good Parley gives you structure without announcing your entire plan.
Your row: Crown; Sun, Round, 2; Sun, Square, 2. The Pool contains Sun, Pentagon, 2; Star, Round, 4; Sun, Wavy, 2; Crown.
The best Claim is Sun, Pentagon, 2 or Sun, Wavy, 2 if it gives the row three Sun dice with 2 Dots and all-different non-Oracle Halos. That is Eclipse.
The Star, Round, 4 has the wrong Shape and Dots. The expert asks whether Shape, Dots, and Halo route all agree.
Your row: Crown; Sun, Round, 2; Sun, Round, 2. The Pool contains Crown; Star, Pentagon, 4; Moon, Wavy, 2.
The best Claim may be Crown. The two non-Crowns are exact twins. Adding a second Crown completes Seal.
The clean pair creates the pivot. Without clean architecture, the pivot would not exist.
The current Oracle Halo is Round. Your row: Crown; Crown; Moon, Round, 4. The Pool contains Crown; Sun, Square, 4; Star, Wavy, 1.
The best Claim may be Crown. The Moon’s Shape and Dots do not matter for Omen. Its Round Halo matters because Round is the current Oracle Halo.
This row is narrow, but dangerous. If another player scores Omen before you, only an immediate Round result preserves the whole route. A Crown removes your Crowns; any other Halo removes the Moon.
Your row: Crown; Sun, Round, 1; Sun, Square, 3. This row has matching Shape but broken Dots.
You might feel close because both non-Crowns are Suns, but Seal and Eclipse both require the non-Crowns to share Dots. This row needs repair before it can become a Sign.
Good options include Recasting the wrong-dot die, using Parley for a matching Sun, Shifting your own row if you are willing to transform the entire row, or Stirring the Pool if the next player is more dangerous.
A broken foundation does not become stronger by adding another floor.
Beginners overvalue the fourth die. They think: “I need to fill my row.”
But filling the row is not the goal. Building a valid Sign is the goal. A bad fourth die can be worse than an empty slot because it fills your row, blocks Claim, and forces you into repair.
An empty slot is possibility.
A bad die is obligation.
Before claiming a non-Crown die, ask:
Am I building Seal, Eclipse, or Omen?
For Seal or Eclipse, does it match the Shape and Dots I need?
For Seal, does its Halo make or preserve exact twins?
For Eclipse, does its Halo help create all-different non-Oracle Halos?
For Omen, does it match the current Oracle Halo?
Does it create more future finishers?
Will it still be useful if the plan changes?
If the die answers well, Claim it. If it only looks good alone, leave it.
Return certainty to chaos, but only with purpose.
Recast is one of the most misunderstood actions in Astral Assembly.
A beginner uses Recast when they do not know what else to do. An expert uses Recast when they know exactly what must be removed.
Recast is not a panic button.
Recast is not a pass.
Recast is not a way to empty your row.
Recast is surgery.
You take one die from your Assembly Row, return it to the Celestial Pool, reroll it, then take one die from the Pool into your row. Your row size does not change.
The deeper lesson is that Recast changes the quality of your row without changing its size. It cuts out a die that does not serve the plan and replaces it with a die that gives the row direction again.
A Claim builds. A Shift transforms. A Stir disrupts. A Recast corrects.
The action has three parts: choose one die from your Assembly Row, return it to the Celestial Pool and reroll it, then take one die from the Celestial Pool and place it in your Assembly Row.
You may Recast only if you already have at least one die in your Assembly Row. This means Recast always asks two questions: which die must leave, and which die should replace it?
If you cannot answer both questions, you are not Recasting well. You are gambling in ceremonial clothing.
Exact repair
Problem row
Pool replacement
Repaired row
Astral Assembly punishes bad structure. A wrong Shape can block Seal and Eclipse. A wrong Dot value can make both Signs impossible. A repeated Halo blocks Eclipse unless the row pivots to exact-twin Seal. An extra Crown can lower your scoring ceiling. A wrong Oracle Halo can make three Crowns useless. A bad fourth die can fill your row without completing anything.
Recast is how you remove the mistake without abandoning the entire row. If your row is almost good, Recast is often the cleanest repair.
It does not throw the whole table into chaos like Stir the Pool. It does not rely on hidden faces like Shift. It does not require another player’s agreement like Parley.
It is controlled correction.
Under the current Signs, Shape and Dots are the spine of both Seal and Eclipse. Seal wants two identical non-Crowns. Eclipse wants three non-Crowns with the same Shape and the same Dots, with all-different non-Oracle Halos.
This means a row often becomes strong when it commits to one Shape/Dot lane, such as Sun 2, Moon 4, or Star 1. Once that lane is clear, Halo decides the route.
Recast is strongest when it removes a die that does not belong to the lane.
First fix Shape and Dots. Then solve Halo.
Crown count decides your scoring ceiling. Three Crowns point toward Omen, which scores 1 die. Two Crowns point toward Seal, which scores 2 dice. One Crown points toward Eclipse, which scores 3 dice.
This means Recasting a Crown is not just a repair. It can raise your ceiling. Turning an excess Crown into the right non-Crown die can move your row from Omen pressure toward Seal or Eclipse pressure.
But the reverse can also be correct. If your non-Crowns are broken and the current Oracle Halo is available, Recasting into a Crown may create the faster Sign.
Shape and Dots define the lane. Crown count defines the prize.
Recast does not reduce your row size. If your row has 4 dice before Recast, it will still have 4 dice after Recast. This means Recast does not directly help the row-size tiebreaker, which matters only after Eclipse count and Seal count are still tied.
Recast also does not directly reduce or increase the Celestial Pool count overall. One die enters the Pool, then one die leaves the Pool.
Do not use Recast because you think it empties your row. Do not use Recast because you think it pushes the End Limit by itself. Use Recast because one die in your row is wrong.
Row surgery.
Quality control.
A way to replace a bad die.
A way to convert one Sign plan into another.
A controlled answer when the Pool has a visible fix.
A pass.
A row reset.
A direct tiebreaker tool.
A direct Pool-count tool.
A reason to gamble without diagnosis.
Before you Recast, name the problem. Do not say, “My row is bad.” Say: “This die breaks my Shape/Dot line,” “This Halo repeats in my Eclipse route,” “This die is not an exact twin,” “This Crown is excess,” or “This fourth die does not complete any Sign.”
Before Recasting, name the wound:
Broken Shape/Dot line.
Repeated Eclipse Halo.
Missing Seal twin.
Excess Crown.
Bad fourth die.
No visible future.
If you cannot name the wound, you are not ready to cut.
A Recast without diagnosis is luck. A Recast with diagnosis is surgery.
The best die to Recast is usually the die that blocks the largest number of futures.
Because Eclipses win the first Sign tiebreaker, a Recast that completes or preserves an Eclipse route is usually more valuable than one that merely creates a low-scoring Omen.
The strongest Recasts do not merely repair. They convert. Conversion means changing the type of Sign your row is moving toward.
Before: Omen route
Pool replacement
After: Seal
Recast can turn a fragile 1-point Omen route into a 2-point Seal, and add a Seal toward the tiebreaker.
You did not simply fix the row. You upgraded it.
Conversion is more opportunistic than automatic. Because Seal requires an exact twin, do not chase this upgrade unless the duplicate is already visible or your current Omen route is weak.
Omen is the most unstable Sign route because it depends on the current Oracle Halo. Three Crowns and one non-Crown die are not enough. The non-Crown die must have the active Oracle Halo.
This makes timing more important than repair. After another player scores Omen, a Crown result removes every Crown from your row. A Halo result removes every non-Crown that does not bear the selected Halo. An Eclipse route is scattered because its different Halos cannot survive the same Oracle judgment together.
If part of the row survives, Recast can rebuild around what remains: fish for a non-Crown with the current Oracle Halo, restore an exact Seal twin, or recover a missing Eclipse family only after the Oracle sequence has ended.
Do not marry an Omen route. The Oracle can move the altar.
Recast is strongest when the Pool already contains the replacement you want. This gives the action control.
With 48 Astral dice in play, the Pool can contain more noise and more opportunity. Before Recasting blindly, scan for exact Shape/Dot/Halo matches and missing Eclipse Halos.
A controlled Recast identifies the bad die, sees the replacement in the Pool, returns and rerolls the bad die, then claims the visible replacement. Your row improves immediately.
A desperate Recast throws a die back and hopes the reroll saves you. Sometimes desperation wins, but experts prefer control.
Recast resolves in order: you return and reroll one die, and only then claim one die from the Pool. Because the die you just rerolled is now sitting in the Pool, you are allowed to claim that same die back. That order turns Recast into a controlled fishing tool, not only a replacement.
This matters most for a die you need but whose top face is wrong. Claim it anyway to keep it off the table, then on a later Recast return it, reroll it, and read the result before you choose. If the reroll shows the face you wanted, take it and your row improves at once. If it does not, take the same die back regardless, keeping a rare Shape, Dot value, exact Seal twin, or missing Eclipse Halo under your control while you wait for a better roll.
This makes Recast a denial tool as much as a repair tool. A key die you keep cycling is a key die no opponent can Claim. It can also preserve a Shift-sensitive near-Sign or a 3-Crown Omen bait whose lone non-Crown could match the next Oracle Halo and score as a Blessing in Disguise.
The cost is real. Rerolling a die you already like can ruin a good face, and the reroll itself is random. The die is not permanently imprisoned: an Oracle Crown can remove it when it shows a Crown, and an Oracle Halo can remove it when its Halo does not match. Fish only with dice whose current face is wrong anyway, or whose denial value is worth the gamble.
Recast does not only replace a die. It can hold one hostage while you wait for the face you need.
Sometimes Recast lets you repair your row and deny an opponent at the same time. If your opponent needs Sun, Pentagon, 2 as an exact Seal twin, a missing Eclipse Halo, or a non-Crown with the current Oracle Halo, you may Recast a bad die and take it yourself.
The best actions in Astral Assembly often do two things: they help you and they hurt the table.
Recast is dangerous under low time because it requires two decisions: what leaves and what enters. If you begin your turn without knowing both, the timer will punish you.
Plan Recasts before your turn starts. During other players’ turns, scan your row and decide which die is expendable. Then scan the Pool for replacement candidates.
The Signs are strict. Blind Recast is weak. If you are not taking a visible replacement, changing Crown count with purpose, or removing a clearly off-lane die, you are probably just giving structure back to the Pool.
The sand is not patient with surgeons.
A full row creates pressure because you cannot Claim. If the row is valid, score it. If it is invalid, ask why.
A full invalid row usually has too many Crowns, not enough Crowns, wrong Shape, wrong Halo for the chosen route, broken Dot pattern, wrong Oracle Halo, or a wrong fourth die.
Recast is often the best answer to a full invalid row because it keeps the useful parts and replaces the failure. But if the entire row is bad, Recast may be too small.
Surgery helps when the patient can be saved.
Best when your row has one bad die, the wrong Crown count, or a visible Pool replacement.
Best when the Pool has no answer and you accept hidden-face risk.
Best when another player has the die you need.
Best when the Pool helps opponents more than you.
Recast replaces a die with a Pool die. Shift transforms dice through hidden face geometry. Recast is better when the Pool has a visible replacement and you know exactly which die is bad. Shift is better when the Pool has no good replacement and you are willing to accept uncertainty.
Recast is the cleaner tool. Shift is the stranger one.
Recast does not require permission. Parley does. If the die you need is in another player’s Assembly Row, Parley may be your only direct way to get it. If the die you need is in the Pool, Recast is usually cleaner.
Use Recast when the answer is public. Use Parley when the answer is in another player’s hand.
Stir changes the shared market. Recast changes your row. Use Stir when the Pool helps others more than it helps you. Use Recast when your row contains a specific flaw and the Pool offers a fix.
Do not disturb the heavens when you only need to remove one bad stone from your own wall.
Your row is Crown; Sun, Round, 2; Sun, Round, 2; Sun, Square, 2. This row has repeated Round Halos while chasing Eclipse. The Pool contains Sun, Pentagon, 2; Crown; Sun, Wavy, 2.
You Recast one Sun, Round, 2 and take Sun, Pentagon, 2. Now the non-Crowns have the same Shape and Dots, with Round, Square, and Pentagon Halos all different. That is Eclipse.
A single Recast turned a broken row into 3 points.
Your row is Crown; Sun, Round, 2; Sun, Square, 2. The Pool contains Sun, Pentagon, 2; Crown; Moon, Wavy, 1.
Current row
Visible finisher
Do not Recast when Claim already completes the plan.
This row already has a strong Eclipse lane: same Shape, same Dots, and different non-Oracle Halos needed. If you Recast one of those Suns because you are curious about what it might become, you are throwing away rare structure.
Beginners Recast emotionally. They dislike a die, so they throw it away. Experts Recast structurally. They identify the die that blocks the most Signs, then replace it with a die that opens the most futures.
The beginner thinks: “I want a better die.”
The expert thinks: “This die is preventing Seal, breaking Eclipse, and occupying space. It must leave.”
The difference is diagnosis.
Before Recasting, ask:
Which die is the problem?
Why is it the problem?
What replacement am I taking?
Does it improve the Shape/Dot lane, the Halo route, the Crown count, or the Oracle Halo?
Does it create a Sign, a threat, or a cleaner future?
Am I improving my Eclipse count, Seal count, or only my immediate points?
Am I protecting a rare Eclipse lane?
Am I fishing a wrong-faced die I can re-take to keep control?
If you cannot name the bad die and the desired replacement, do not Recast yet.
Also ask whether Claim, Shift, Parley, or Stir could do this better.
The Celestial Pool is a market. Control what it offers.
The Celestial Pool is not background. It is the shared market of the entire game.
Every player buys from it. Every player reads it. Every player fears what it may offer next. A die sitting in the Pool does not belong to anyone yet, but it already has value.
A beginner looks at the Pool and asks:
What can I take?
An expert asks:
What must not remain?
When you Claim a die, Stir the Pool, Recast into it, or deny an opponent’s finisher, you are not merely changing your own turn. You are changing the available future of the table.
Control possibility, and you control the pace of the game.
Pool Control is the habit of treating every visible die as a resource with an owner who has not yet claimed it.
Some dice are useful to you. Some dice are useful to opponents. Some dice are dangerous only because of turn order. Some dice are harmless for the moment, but will become dangerous after one player Claims a Crown, finds an exact twin for Seal, or builds a same-Shape, same-Dots Eclipse family.
A good player improves their row.
A better player improves their row while leaving the next player nothing easy.
A master sometimes ignores personal improvement to destroy the next player’s perfect opportunity.
The Astral Signs are precise, and a 48-dice Pool creates plenty of noise. Most dice are harmless to most rows, but the exact missing die can be decisive.
For Seal, watch for exact twins: same Shape, same Halo, same Dots. For Eclipse, watch for missing non-Oracle Halos inside the same Shape and Dot family. For Omen, watch the current Oracle Halo.
This means Pool Control is less about damaging the Pool randomly and more about removing the one die that actually completes a Sign.
Astral Assembly is an open-information game. The truth is on the table. The trick is seeing which truth matters first.
If an opponent needs exactly one die and that die is visible in the Pool, the game is asking you a question: can you afford to leave it there?
A single ignored die can complete an Eclipse if it matches Shape and Dots while adding a missing non-Oracle Halo. A Crown left in the Pool can become a Seal. An exact-twin non-Crown can become 2 points before your next turn. A die with the Oracle Halo can become dangerous when a player has 3 Crowns.
Pool Control wins games because it prevents simple victories.
On every turn, scan:
Can I score this turn?
What is the current Oracle Halo?
Can I build a strong scoring threat?
Is there a die in the Pool that completes an opponent’s row?
Does anyone with 3 Crowns need an Omen-Halo die?
Does anyone need an exact twin for Seal?
Does anyone need a missing non-Oracle Halo for Eclipse?
Is there a Crown supply problem, especially for Seal or Omen?
Does the next player have an obvious Claim?
Is the Pool near the End Limit?
Would Stir help me more than it helps others?
Can I deny and improve at the same time?
This scan should happen before your timer begins, during other players’ turns. When your own timer starts, you should already know what the Pool is offering and what it is threatening.
A die has different value depending on the table. A Sun, Pentagon, 2 might be worthless to one player and priceless to another.
Opponent’s Assembly Row
Celestial Pool
The Sun, Pentagon, 2 is not just a Sun. It is the missing non-Oracle Halo in a same-Shape, same-Dots Eclipse set. You may Claim it not because it is perfect for you, but because it is too perfect for someone else.
A Defensive Claim is when you Claim a die mainly to stop another player. This can feel strange to newer players, but Astral Assembly rewards denial.
The golden version of denial is taking what they need because you can use it too.
Defensive Claim becomes weak when it costs too much. Do not deny a small threat if you are giving up a major score. Do not Claim a die that damages your row just because another player might like it.
If your opponent might score 1 point with Omen, but you can score 3 with Eclipse, score your Eclipse. That Eclipse also matters for the first tiebreaker.
A defensive player who never scores becomes a servant of the table.
Stir the Pool is often underestimated. It does not change your Assembly Row, so beginners may think it is weak. But Stir can be one of the strongest defensive actions in the game because it changes what everyone can buy.
Opponent’s Assembly Row
Stir targets
Stir is strongest when the Pool contains exact threats for the next player and nothing essential for you. Because the Signs are precise, Stir is weaker as random mess-making and stronger as targeted denial. Stir does not score. It prevents scores. That is sometimes better.
The dangerous die also helps you.
You have room in your Assembly Row.
You want to remove one exact die.
You do not want to risk rerolling it into something better.
You can deny and build at the same time.
You cannot Claim.
The die does not help you.
Multiple Pool dice are exact threats.
The Pool strongly favors the next player.
You want to create timer pressure.
You need to change the market without changing your row.
Claim removes one known die. Stir can remove up to four threats, but rerolls uncertainty back into the Pool. The expert knows which risk the table needs.
Crowns deserve special attention. A Crown in the Pool is never ordinary because every Sign needs one.
Ask how many Crowns are visible, who has no Crown, who has exact twins for Seal, who has same-Shape, same-Dots families for Eclipse, who needs a second or third Crown, and whether this Crown helps you more than the next player.
Not every Crown is equally dangerous. A Crown beside a player with clean structure is a key. A Crown beside a player with a dirty row may be bait.
The Oracle Halo changes the value of every non-Crown die in the Pool. A Moon, Wavy, 1 may be ordinary most of the game, but if Wavy is the Oracle Halo and an opponent has 3 Crowns, it becomes a scoring key.
Omen scores only 1 die, but its Oracle sequence can move many more. A Crown result empties every Crown-up die from Assembly Rows into the Pool. A Halo result sets the Oracle Halo and returns every non-Crown row die with another Halo. One small score can flood the market with carefully held pieces and erase visible finishers.
Before leaving an Omen-Halo die in the Pool, ask who can score it, which rows would be stripped by each Oracle face, who benefits from the returned dice, and whether the larger Pool delays an ending you wanted.
A die’s danger depends on who acts next. If the player to your left needs a die, leaving it in the Pool is urgent danger. If the player three seats away needs it, there may be time for the table to change.
The best Pool Control often targets the next player because they get the first chance to use what you leave behind.
The Pool cannot be understood without the Assembly Rows around it. A die is only dangerous if it connects to a row.
If an opponent has Crown, Sun Round 2, Sun Round 2, then a Crown in the Pool is dangerous because it may complete Seal. If another has Crown, Sun Round 2, Sun Square 2, then Sun Pentagon 2 or Sun Wavy 2 may complete Eclipse.
The same Pool can contain three different threats for three different players. Your job is to decide which threat matters most.
Pool Control often means watching families of dice. Seal wants an exact twin. Eclipse wants the same Shape and Dots across different non-Oracle Halos. Omen wants any non-Crown with the current Oracle Halo.
Pool Control changes when one player is ahead. If the leader is close to scoring, denial becomes more valuable. You do not need to stop every player equally. You need to stop the player whose score will decide the game.
If the leader is tied or nearly tied, Eclipses and Seals deserve extra attention because they decide tiebreakers before Assembly Row and die rolls.
A court that waits for someone else to stop the king usually gets ruled.
If you are behind, Pool Control becomes more selective. You cannot spend every turn denying. You need points, and Eclipses are especially valuable because they score 3 and win the first tiebreaker.
Deny when the leader is about to score, when denial also helps your own row, when the dangerous die would end the game, when Stir creates volatility, or when you need one more turn to finish a larger Sign.
A strong sequence is to notice the next player is relying on one or two exact Pool dice, Stir those dice away, end your turn quickly, and force them to read the changed market under timer pressure.
This is not just denial. It is tempo warfare. The dice are public, but time controls who can use that information.
When you Recast, you return a die to the Pool and reroll it. That die may become useful to someone else. Then you take a die from the Pool into your row. Because you reroll before you claim, you can also take that same die back, which lets you keep cycling a die you must deny the table instead of handing it to the next player.
Before Recasting, ask what you are adding to the Pool, what you are taking away from it, and whether you are repairing your row while feeding an opponent an exact twin, missing non-Oracle Halo, Crown, or Omen-Halo die.
Parley changes the market between players, not the Pool. But it can move key dice out of Assembly Rows and open or close threats.
A Parley can also be used politically to deny the leader, but every bargain leaves information behind. Do not hand another player an exact twin, missing non-Oracle Halo, Crown, or Omen-Halo die unless the trade is worth that risk. The table learns what you value.
Near the end of the game, Pool Control becomes sharper. When the Pool reaches the End Limit, the game end is triggered after the current matter is resolved. Then any player with exactly 4 dice in their Assembly Row checks for one final Astral Sign.
Sometimes denying a Pool die is less important than preventing a player from reaching a strong final-check position. Late Pool Control is about stopping the last possible score, including final Omen checks using the current Oracle Halo.
Near the end, denying an Eclipse may matter even beyond its 3 points because Eclipses are the first tiebreaker. Seals matter next.
Your opponent, who acts after you, has Crown; Sun, Round, 2; Sun, Square, 2. The Pool contains Sun, Pentagon, 2; Crown; Sun, Wavy, 4; Moon, Round, 2. You have Crown; Star, Wavy, 1.
The Sun, Pentagon, 2 completes your opponent’s Eclipse. It may also help your future, though it does not complete anything yet. You Claim it.
A defensive Claim is justified when the prevented score is greater than the opportunity you sacrifice.
The next player has Crown; Sun, Round, 2; Sun, Round, 2. The Pool contains Crown; Star, Pentagon, 4; Sun, Wavy, 1; Moon, Round, 3. You have a full invalid row, so you cannot Claim.
The Crown in the Pool completes their Seal. You Stir the Pool and choose the Crown as one of the dice to reroll. Stir is often the answer when Claim is unavailable.
You have Crown; Sun, Round, 2; Sun, Square, 2. The Pool contains Sun, Pentagon, 2 and Crown. The Sun completes your Eclipse. Another player might like the Crown, but they are not close to scoring.
Your Assembly Row
Celestial Pool
Do not deny a future threat by ignoring a present victory.
If you Claim the Crown just to deny them, you miss your own Eclipse. That is bad denial.
Beginners play only from their own row. They see the Pool as a supply of dice for themselves. They do not see that every die they leave behind becomes part of someone else’s turn.
They also overuse denial emotionally. The expert balances both: first, can I score? Second, can I build? Third, must I deny?
You are trying to win, not merely make others lose slowly.
Before leaving the Pool, ask:
What is the best die I am leaving?
Who acts before I return?
Does it complete a Sign?
What kind of threat is it: exact twin, missing non-Oracle Halo, Crown, or Omen-Halo die?
Does it help the leader?
Can I Claim it?
If not, should I Stir it?
If the Pool gives the next player an obvious score and you cannot score more yourself, deny it.
Think on their time. Execute on yours.
The timer in Astral Assembly is not only a restriction. It is a weapon.
A beginner treats the timer as a threat hanging over their own turn. An expert does not begin thinking when the timer starts. An expert begins thinking the moment the previous player acts.
By the time the hourglass turns, the expert already knows the likely Claim, the emergency Recast, the dangerous Pool die, the possible Parley, the current Oracle Halo, and whether the table must be Stirred.
The active turn is not for discovery. The active turn is for execution.
Timer strategy means using time as part of the board state. The dice matter. The Pool matters. The rows matter. The order of play matters. The sand matters too.
You cannot force another player to make a mistake, but you can give them less time, more information to process, fewer obvious choices, and a table that changed just before their turn.
A strong move changes dice. A stronger move changes dice and gives the next player no time to understand them.
Astral Assembly is an open-information game, but open information is only useful if a player has time to process it.
Under time pressure, players miss Signs, forget the current Oracle Halo, overlook exact Seal pairs, mistake Eclipse for general variety, forget Crowns do not score, Claim attractive dice that break row architecture, Recast without diagnosis, or Shift too quickly and risk Blessing in Disguise.
The timer turns knowledge into performance.
Strategy under time is arranging the table so others must think faster than they can.
Know before the glass turns:
My best scoring move.
My best building move.
My best defensive move.
The current Oracle Halo.
Whether anyone is one die from Omen.
Which exact twins, plus Crown access, threaten Seal.
Which same-Shape, same-Dots Halo families are near Eclipse.
Which row dice each Oracle face would return if someone can score Omen.
My likely Recast target.
Whether Stir hurts the next player.
Whether Parley is real.
Whether Sacrifice matters.
Whether the End Limit is near.
Most of your thinking should happen when it is not your turn. You do not need to solve the whole game every second. You need to keep a shortlist of likely actions.
The first three seconds of your turn are precious. A beginner spends them discovering the table. An expert spends them confirming the table.
Before touching anything, quickly confirm whether the previous action changed your plan, whether your intended die is still available, whether an opponent created another threat, and whether your Assembly Row has a possible Sign.
The first three seconds should be a confirmation, not a council meeting.
The current Oracle Halo is part of the timer. If you have to ask which Halo is active after your timer starts, you are already spending sand.
Track the Oracle Halo during every player’s turn. A Pool die with the Oracle Halo is more dangerous when Crowns are available, and an Omen score can change the whole table’s priorities before the next turn begins.
Do not start your turn by remembering the Omen. Start your turn already knowing it.
A fast turn can be an attack. If you act quickly, the next player has less off-turn time to examine the table before their own timer starts.
This matters most after Stir the Pool, a Recast that changes a visible die, a scoring event that returns Crowns to the Pool, an Omen whose Oracle sequence strips dice from Assembly Rows, a Shift, a Parley, or any roll that bumps and changes the board.
One of the strongest timer plays is to Stir important Pool dice, end your turn cleanly, and force the next player to read the changed Pool under pressure.
Opponent’s Assembly Row
Pool under sand
Stir does not only change dice. It steals preparation.
Parley is unusual because it pauses the timer until the opponent answers. That pause is not a loophole. It is a negotiation chamber.
Use the pause like a courtly breath, not a hiding place. If using an hourglass, lay it flat when Parley is offered and stand it upright once the opponent answers.
Parley pauses the timer only while the opponent answers.
A tactical Parley seeks a needed die, tests whether an opponent understands your plan, forces a rival to reveal value, creates cooperation against the leader, or buys a brief legal pause while a real offer is considered.
The best Parley is not just “give me that die.” It is: “This trade gives you something, but gives me exactly enough.”
Under timer pressure, players often reveal too much. They say what they need, what an opponent needs, or which action they fear.
Think silently. Ask only what you must. Announce only what the rules require. Let your action reveal as little as possible.
Players hesitate when the Pool is messy, their obvious Claim disappears, their row has several repairs, they are unsure whether a Sign is valid, they are tempted by risky Shift, or the End Limit is near.
A good strategy does not always remove an opponent’s options. Sometimes it gives them too many options.
Seal and Eclipse reward quick sorting, not general variety. For Seal, look for exact twins: same Shape, same Dots, same Halo. For Eclipse, look for a family: same Shape and same Dots, with three different non-Oracle Halos.
Under the timer, the player who recognizes families and twins fastest will see scoring threats before the player who is still scanning every die as a separate object.
If a player runs out of time before finishing their turn, Sabotage triggers. The player to their right chooses 1 die from their Assembly Row and rerolls it into the Celestial Pool.
You cannot choose Sabotage as an action, but you can increase its likelihood by Stirring before their turn, denying their obvious Claim, leaving them with a full invalid row, or playing quickly so they get less off-turn time.
If your Assembly Row is empty and your timer expires, Sabotage triggers but has no die to affect. This can sometimes preserve a position, but it is not a noble Pass action and should not become a default.
Gives the next player less time to prepare.
Changes the Pool, then forces the next player to read it under pressure.
Pauses the timer only when the offer is real.
Makes hesitation dangerous when the opponent’s row can be damaged.
Act quickly.
Deny Eclipse halo sets.
Break exact Seal pairs.
Stir before dangerous players.
Take safe scores.
Avoid risky Shift.
Do not give generous Parley.
Create targeted volatility.
Stir against the leader.
Parley with trailing players.
Chase visible Eclipse families.
Force the leader to defend.
Consider Sacrifice before the end trigger.
When you are leading, time is a closing tool. Fast, clean, low-risk turns are powerful because the leader does not need every point. The leader needs the game to end before the table catches them.
When you are behind, time is volatility, but volatility still needs a target. Stirring blindly is weaker than stirring to expose Crowns, break the leader’s twins, reset an Omen threat, or complete a visible Eclipse family.
Near the End Limit, know score totals, Eclipse counts, Seal counts, Pool count, row sizes, final Sign checks, Sacrifice relevance, and whether a safe score wins more than a risky build.
The endgame does not forgive players who start counting too late.
You score an Omen with the current Oracle Halo. The Crowns return to the Pool, then the Oracle judges every remaining row. Crown results send Crown-up row dice into the Pool and pass the Oracle clockwise; the first Halo result sets the new Oracle Halo and sends nonmatching non-Crowns into the Pool.
You scored only one die, but the next player must read a larger Pool, thinner rows, and a changed Halo under timer pressure.
The next player has Crown, Sun Round 2, Sun Round 2. The Pool contains Crown and three tempting dice. You cannot Claim because your row is full and invalid, so you Stir the Crown and three other Pool dice, then end your turn quickly.
You did not score. But you attacked their preparation.
Your row has Crown, Sun Round 2, Sun Square 2, and Moon Wavy 2. Another player has Sun Pentagon 2. You offer Moon Wavy 2 for their Sun Pentagon 2. If they accept, and none of the three Sun Halos is the Oracle Halo, the swap leaves your row with Crown plus three Sun 2 dice with all-different non-Oracle Halos, completing an Eclipse family. If they refuse, you learn they understand the Sun’s value.
Your timer starts, and you begin scanning too late. You notice threats too late, discover your row is full, cannot choose a Recast target, fear Shift, and the sand ends.
If the sand ends before your turn is finished, Sabotage speaks.
This mistake began when you failed to think during other players’ turns.
Beginners treat the timer like a personal obstacle. Experts treat the timer like a shared battlefield. The beginner tries to survive their own turn. The expert asks how to make the next player’s turn harder.
Before your turn begins, decide.
During your turn, confirm.
Then act.
During your turn, ask only whether anything changed. If not, execute.
Shift is a blade that can cut the hand holding it.
Shift is the strangest action in Astral Assembly. It does not add a die. It does not remove a die. It turns what already exists into something else.
When you Shift your own Assembly Row, you choose one table direction and turn all dice in your row one step in that direction. When you Shift an opponent, you choose one die in their row and turn that die one step in the chosen direction.
If your Shift causes an opponent’s Assembly Row to form a valid Astral Sign, they can immediately call and score it as a Blessing in Disguise, then take dice from your score pile according to the Blessing rule.
You may reach across the table with a knife and hand your rival a crown.
Shift is not a reroll, a free rotation, or permission to inspect hidden faces. Choose one table direction before touching the die or dice, then tip the affected die or dice one step in that direction. Do not lift, spin, rotate freely, or examine hidden faces before choosing.
The resulting top face stands. A player who Shifts well understands risk, memory, board state, and consequence.
Your row: all dice turn
Opponent row: one die turns
Turns all dice in your Assembly Row.
Transforms the whole row.
Useful when the Pool has no answer.
Can rescue a dead row.
Can ruin a clean row.
Turns one die in one opponent’s Assembly Row.
Can damage their structure.
Can deny a near-Sign.
Can trigger Blessing in Disguise.
Cannot target the same opponent on two of your turns in a row.
Shift is the highest-risk disruption tool in the game. It can change a row without touching the Pool, attack a player who has protected their plan, or rescue your own row when the Pool offers nothing.
But Shift asks you to trust memory, probability, nerve, and the current Oracle Halo. Every Shift should begin with a question: what is the worst face this die could become?
If the worst face gives your opponent a Blessing in Disguise, put your hand back.
Danger: a careless Shift can awaken Blessing in Disguise.
Blessing in Disguise is the rule that makes Shift frightening. If your Shift completes an opponent’s valid Astral Sign, they score immediately, their row empties, and your action becomes their victory.
Before Shifting an opponent, ask:
Do they have 4 dice?
Do they have at least 1 Crown?
Could the Shift create 3 Crowns and a non-Crown with the current Oracle Halo for Omen?
Could it create 2 Crowns and exact-twin non-Crowns for Seal?
Could it create 1 Crown and three same-Shape, same-Dot, all-different non-Oracle-Halo non-Crowns for Eclipse?
Did the last Oracle sequence leave a concentrated Omen or Seal threat?
The current Oracle Halo matters whenever a row contains 3 Crowns. Before Shifting that row, ask whether the fourth die already has the Oracle Halo or whether your Shift could reveal it and give the opponent an Omen Blessing.
After any Omen, re-read every row that survives. A Crown result removes all Crown-up row dice. A Halo result removes non-Crowns with other Halos. The rows left behind are smaller and more concentrated around the selected Halo, so yesterday’s Shift target may no longer exist and a preserved 3-Crown row may already be a valid Omen.
The Oracle changes both the target and the pieces still standing.
Use offensive Shift when you want to damage another player’s row. It is strongest when one die is holding the row together, when a specific Shape, Halo, or Dot value is responsible for the threat, when the current Oracle Halo is part of their plan, or when the opponent is ahead.
Do not Shift randomly. Choose the pillar, then remove it.
Offensive Shift is safer against unstructured rows. If the opponent’s non-Crowns do not share Shape and Dots, are not near-exact Seal twins, and are not connected to the current Oracle Halo, the chance of accidentally creating a Blessing is usually much lower.
But Shift is not a random roll. It depends on the die’s hidden adjacent face, the chosen table direction, and any legal memory players have about that die.
Avoid offensive Shift when the opponent has 4 dice and is close to valid, has 3 Crowns and a fourth die one Shift away from the current Oracle Halo, has 1 Crown and a near-complete same-Shape/same-Dot Eclipse row, has 2 Crowns and near-exact twins, or when you cannot quickly evaluate Blessing risk.
If you cannot explain why the Shift is safe, it probably is not.
Shift can defend against a future score when Claim and Stir cannot solve the problem. You are not denying a Pool die. You are denying architecture. But a bad Shift may fix the failure.
Early in the game, Shift is often less necessary because Claim, Recast, and Stir may offer cleaner answers. As the Pool thins and rows become more exact, Shift becomes sharper and more dangerous.
Own-row Shift transforms the entire row. Use it when your row has no clear Pool fix, is weak but not worth Recasting one die at a time, needs volatility, or may improve through hidden faces. Do not throw a good row into the wind.
A full invalid row is a common reason to consider Shift. Recast is best if one die is clearly wrong and the Pool has a replacement. Shift is best if the entire row might improve by transformation, or if no visible replacement exists.
A Shift trap is a row designed to punish interference. Traps must be exact: near-twin Seals, same-Shape/same-Dot Eclipse rows, or 3-Crown Omen rows near the current Oracle Halo. A messy row is rarely a trap. A precise row with one wrong face can be.
Bait row
Possible Blessing
Blessing bait: the attacker thinks they are breaking the row, but may complete it.
Blessing in Disguise can be sprung without an opponent touching your row. The viable Oracle bait is an unfinished Omen: 3 Crowns and one non-Crown whose Halo is not currently the Oracle Halo.
Bait row, Oracle Halo is Square
If the first Oracle roll selects Round
Oracle bait: if another player scores Omen and the first Oracle roll selects your non-Crown’s Halo, all four dice remain and your row becomes a valid Omen. You may call Blessing in Disguise, score 1 point, and take up to two dice from the scorer.
The trap has one winning Oracle face. A Crown result removes your three Crowns before the Oracle passes. Any other Halo removes your lone non-Crown. The bait is therefore a calculated swing, not a stable engine, but its reward can become a 3-point gain: 1 scored die and up to 2 dice taken from the player who invoked the Oracle.
The Oracle rewards one exact prophecy and scatters every other version.
Against aggressive Shifters, keep weak rows small, avoid leaving fragile 3-dice near-Signs exposed, watch whether the current Oracle Halo makes your row dangerous to touch, and create 4-dice rows that can punish reckless Shift.
Low investment. Easier to rebuild. Usually less attractive to attack.
High information, low punishment. Often fragile because opponents can read the plan.
High risk, high punishment. Invalid rows need repair, but reckless opponent Shifts may trigger Blessing in Disguise.
Shift rewards memory. If a die has been legally Shifted before, or its faces became known through public play, players may remember that information. What is not allowed is inspecting hidden faces before choosing.
A skilled player remembers. A dishonest player inspects.
Shift uses table direction. Choose a direction relative to the table before touching the die: forward, back, left, or right. Do not choose a face. A clean Shift is not only legal. It is ceremonial.
Shift can burn time quickly. You must evaluate the row, choose the target, choose a direction, perform the tip legally, then understand the result. A rushed Shift is often worse than no Shift.
When you are leading, Shift becomes more dangerous because Blessing in Disguise can give an opponent points and take dice from your score pile. Leaders should prefer controlled denial: Claim, Stir, safe Recast, safe score.
When you are behind, Shift becomes more attractive because you may need volatility. But risk is not the same as chaos. A good trailer Shift creates a chance to catch up. A bad trailer Shift crowns the leader.
Eclipse is the first tiebreaker, and Seal is the second. That makes dangerous Shift even more expensive: completing an opponent’s Eclipse may give them immediate points and the strongest tiebreaker later.
Because Eclipse is rare and important in ties, an Eclipse Blessing is especially costly. Do not evaluate Blessing in Disguise only by immediate points. Ask whether the Shift could hand over an Eclipse or Seal count that matters at the end of the game.
An opponent has Crown, Sun Round 1, Sun Square 3. They have only 3 dice, and their non-Crowns have matching Shape but broken Dots, so there is no immediate Blessing risk and the row is not cleanly close to Seal or Eclipse. Shifting one Sun may be relatively safer because the current row is structurally flawed.
Safer target: already mismatched rows are less likely to become valid immediately.
An opponent has Crown, Sun Round 2, Sun Square 2, Sun Pentagon 1. The row is close to Eclipse. If you Shift the last Sun and it becomes a 2-dot Sun while keeping a distinct Halo, you may complete their Eclipse. That would be Blessing in Disguise.
Your row has Sun Round 1, Sun Square 3, Sun Pentagon 2. You have no Crown and the Pool has no visible Crown. You Shift your own row because you are behind and need authority. This is not clean control. It is a storm you choose because the sky is otherwise empty.
Your row has Crown, Crown, Sun Round 2, Sun Round 3. This is not Seal because the non-Crowns are not exact twins. If an aggressive opponent Shifts the second Sun into Round 2, they create your Seal.
An opponent has three Crowns and one non-Crown die. If that non-Crown die has the current Oracle Halo, their row is already an Omen threat. If it does not, Shifting that die may still be dangerous because one hidden face could reveal the current Oracle Halo and cause a Blessing in Disguise.
Danger: three Crowns make the current Oracle Halo the only question that matters.
Beginners make two opposite Shift mistakes. Some never Shift because it feels uncertain. Others Shift constantly because it feels powerful. Both are wrong. Shift is a high-leverage tool that belongs in specific situations.
The beginner sees Shift as a chance. The expert sees Shift as a contract with consequences.
Before Shifting, ask:
What am I trying to change?
Is another action safer?
Could this complete an opponent’s Sign?
Have I checked the current Oracle Halo?
Can I survive Blessing in Disguise?
Am I using legal memory, or guessing blindly?
Am I acting from strategy, or frustration?
If the Shift can lose the game and does not need to be made, do not make it.
A bargain is never only a bargain.
Parley is the most social action in Astral Assembly. It asks another player to become part of your plan.
You offer one die from your Assembly Row. You ask for one die from theirs. The timer pauses while they answer. If they agree, the chosen dice are swapped. If they refuse, you must choose another action before the timer expires.
A Parley is a trade.
A Parley is a question.
A Parley is a confession.
A Parley is sometimes a threat dressed as courtesy.
A beginner uses Parley when they want a die. An expert uses Parley to measure the room.
Parley moves dice between Assembly Rows. It does not touch the Celestial Pool, reroll, or create a die from nowhere. It changes ownership of visible resources already sitting before players.
If your exact finisher is in the Pool, Claim or Recast may be cleaner. If your exact finisher is in another player’s Assembly Row, Parley may be the only direct path. But the other player must agree.
Parley creates tactical value and social information at the same time. If the other player accepts, dice move. If they refuse, information still moves.
Their refusal may tell you they need the die, know you need it, fear your row, protect their own future, or want to make you spend time.
At a serious table, a refused Parley can be as revealing as an accepted one.
The timer pauses until the opponent answers. If using an hourglass, lay it flat when Parley is offered and stand it upright again once the answer is given.
The timer pauses only while the opponent answers.
Before offering Parley, ask:
What do I gain?
What do they gain?
Who benefits first?
Who benefits more?
Is this an exact die, or only a useful die?
What does the offer reveal?
Does this help someone score Eclipse, Seal, or Omen?
If the trade gives them a reason to say yes but gives you the better future, the offer is alive.
Your Assembly Row
Opponent’s Assembly Row
If the offer only helps you, it is not negotiation. It is begging with ceremony.
A die leaves your row, but it does not leave the game.
Gives the opponent real value.
Improves your row more than theirs.
Does not let them score immediately.
Does not help the leader too much.
Comes with a backup plan if refused.
Feels fair enough to accept.
Only helps you.
Gives the leader a stronger path.
Lets the next player score too easily.
Reveals your plan for too little gain.
Uses Parley only to pause the timer.
Leaves you helpless if refused.
A good Parley offer gives the opponent something real, but bounded: a die that repairs their dirty row, a Crown when it does not complete their structure, an exact-twin candidate when they lack the second Crown, or a useful Shape/Dot match that does not supply the missing Eclipse Halo.
The best Parley lets the opponent feel clever for accepting.
The safest Parley also makes sure they were not too clever.
A bad Parley offer is insulting, useless, or too revealing. Once players believe your offers are traps or time-wasters, they will refuse faster. Reputation matters. A player who bargains well gets more bargains.
If your row has Crown, Sun Round 2, Sun Square 2 and another player has Sun Pentagon 2, Parley may target a known Eclipse solution. It is strong, but revealing. If it fails, you may have exposed your plan without improving your row.
The Signs make exact dice important. For Seal, you may need the exact twin of a die you already have. For Eclipse, you may need the same Shape and Dots, but a different unused Halo.
This means a Parley is often not asking for a generally useful die. It is asking for the one visible die that makes your row legal.
Parley can repair bad architecture. Seal needs two identical non-Crown dice: same Shape, same Dots, and same Halo. Eclipse needs three non-Crown dice with the same Shape and Dots, all different non-Oracle Halos, and no Oracle Halo. If another player has the exact die your pattern needs, Parley may be faster than waiting for the Pool.
When one player is ahead, trailing players may need to help one another create pressure. This is not charity. It is survival.
A coalition is not friendship. It is temporary weather.
Parley rarely.
Seek safe, immediate value.
Avoid helping trailers.
Avoid volatility.
Do not give generous trades.
Prefer controlled closure.
Parley aggressively.
Seek exact finishers.
Trade with other trailers.
Create pressure on the leader.
Accept calculated risk.
Use refusal as information.
If you are leading, Parley should be rare and controlled. The leader usually wants stability. The leader’s best bargain is often no bargain.
Also watch the tiebreakers. A leader should be careful about giving trailers Eclipse chances, because Eclipse count is the first tiebreaker.
If you are behind, Parley becomes more attractive. You need exact finishers, political trades, and cooperation against the leader. A refused Parley can still reveal who is willing to cooperate.
When scores are close, a Parley that helps you score Eclipse may be better than a safer Seal. Eclipse scores 3 dice, Seal scores 2 dice, and Eclipse is also stronger in the tiebreaker order.
Trading with the player to your left is risky because they act next. Trading with a player farther away gives the table more time to react. The expert asks not only whether a trade is good, but when it becomes dangerous.
If you ask for a Crown, the table knows you are moving toward a Sign. If you ask for an exact twin, the table may suspect Seal. If you ask for the same Shape and Dots with a missing unused Halo, the table may suspect Eclipse. If you ask for the current Oracle Halo while holding Crowns, the table may suspect Omen. The information cost must be worth the material gain.
The Oracle Halo makes one Halo temporarily more valuable than the others. If a player has three Crowns, a non-Crown die with the current Oracle Halo may complete Omen.
That makes Parley dangerous. Asking for the current Oracle Halo may reveal your plan. Offering the current Oracle Halo may give another player the easiest score on the table.
After an Omen is scored, the Oracle does more than change value. A Crown result removes Crown-up dice from every row; a Halo result removes non-Crowns with other Halos. A trade that looked durable may be scattered before either player can use it, while exact twins bearing the selected Halo may survive together.
A player should refuse when the requested die is essential, the offered die helps less than it helps the asking player, the trade gives the asking player a score, or they believe the asking player has no good backup. But refusal has a reputation cost.
At a noble table, memory is a second score pile.
Before making the offer, know your fallback:
Claim if refused.
Recast if refused.
Stir if refused.
Shift if refused.
Sacrifice decision after the action, if relevant.
A Parley refusal should change your turn. It should not destroy it.
If another player’s Assembly Row forms an Astral Sign because of your Parley, they may call it only on their own turn. This differs from Blessing in Disguise, which belongs to Shift. There may be a window to disrupt the mistake.
The pause should protect negotiation, not indecision. For stricter tables, agree before play that a Parley must be answered within a brief count.
You are behind the leader. Your row has Crown, Sun Round 2, Sun Square 2, and Moon Wavy 2. Another trailer has Sun Pentagon 2 and is not using it well. You offer Moon Wavy 2 for Sun Pentagon 2, giving them a real future while giving you the missing non-Oracle Halo that completes Eclipse.
It gives them a reason to say yes, but gives you the sharper result.
You are leading. The player to your left has Crown, Crown, Sun Round 2, and Star Wavy 4. They ask to swap their Star Wavy 4 for your Sun Round 2.
Danger: this trade gives the next player the exact matching die for Seal. They cannot call it until their own turn, but because they act next, the window to disrupt it is tiny.
Your row has Crown, Crown, Sun Round 2, and Star Wavy 4. Another player has Sun Round 2. You ask to swap Star Wavy 4 for it, hoping to complete Seal. They refuse. If you planned well, you already know your backup.
If refusal costs your whole turn, the Parley was poorly prepared.
Beginners think Parley is about convincing another player to give them what they want. The expert bargains for timing, information, pressure, and permission.
Before offering Parley, ask:
What die do I want?
Why do I need it?
What am I offering?
Why would they accept?
Does the trade help me more than them?
Can they score from my die before I benefit from theirs?
Am I helping the leader?
What information does this reveal?
What is my backup if they refuse?
Am I giving away the current Oracle Halo?
Am I helping someone complete Seal with an exact match?
Am I helping someone complete Eclipse with the missing non-Oracle Halo?
Does this trade affect score, Eclipse count, or Seal count?
If you cannot answer why they would say yes, do not offer.
If you cannot survive them saying yes, do not offer.
Near the end, points are not the only score.
The endgame of Astral Assembly begins before the rules announce it.
A beginner notices the end when the Celestial Pool reaches the End Limit. An expert notices the end several turns earlier.
They count the Pool, score piles, Assembly Row sizes, who has 4 dice, who has an exact Sign path, who can force the end, and who wins if no one scores again.
Near the end, you must ask: what ending am I creating?
The end of the game is triggered when the Celestial Pool has dice equal to or below the End Limit.
12 dice
8 dice
4 dice
When the End Limit is reached, finish resolving the current action, Astral Sign, penalty, Sacrifice, or timeout effect. Then the game ends. After that, any player with exactly 4 dice in their Assembly Row checks for one final Astral Sign.
The Celestial Pool is not only a supply of dice. It is the game clock. The Pool shrinks as players build and rises when Crowns return, points are Sacrificed, penalties return dice, or Sabotage sends a row die back. After an Omen, the Oracle can return many dice from several Assembly Rows at once, so the clock, the market, and the Halo can all change together.
Pool decreases by 1.
Net Pool count change is 0.
No direct count change, but may trigger Blessing in Disguise.
No Pool count change.
No count change.
Pool increases by returned Crowns.
Pool increases by every affected Assembly Row die.
Pool increases by 1.
Pool increases by 1 if a row die returns.
Near the end, points and time pull against each other. Claiming may help your row but trigger the end. Scoring gives points but returns Crowns. Scoring Omen may return many additional row dice through the Oracle. Sacrifice costs a point but may buy time. Recast may improve your row but does not buy more turns by count.
The endgame is arithmetic wearing a velvet cloak.
You are leading.
You are ahead on points or Sign-count tiebreakers.
Opponents are close to exact Seal or Eclipse patterns.
Your row is weak.
The next player is dangerous.
A small score or Claim preserves your advantage.
You are behind.
You have a concrete Eclipse path: same Shape, same Dots, and different non-Oracle Halos.
You need one more turn.
You lose current points or Sign-count tiebreakers.
Sacrifice can buy time before the end trigger.
The extra turn can become points.
You may want to force the end when you are leading, opponents have dangerous exact-pattern rows, you are ahead on Eclipse and Seal counts, or you want to deny the table another full turn cycle.
Leader mindset: “I do not need a perfect ending. I need an ending that preserves my advantage.”
Delay when you are behind, have a concrete near-Eclipse, need one more turn cycle, lose if the game ends immediately, or can Sacrifice before the trigger to create one more round of danger.
A concrete near-Eclipse means you already have the Crown and matching Shape-and-Dot dice, and you are missing only the right different Halo.
Delay because you can still create a different ending, not because you dislike losing.
A Phantom Point is the end-of-turn Sacrifice, after your action and any Sign check, used before the end trigger to return one scored die to the Pool and buy time.
It is strong only if the extra time can become a specific better score, not just a hopeful one.
End-of-turn Sacrifice before the end trigger may buy one more chance.
Phantom Point is strongest when the end has not triggered yet, you are behind, you have a specific Sign path coming, losing 1 point does not materially change your losing position, and the leader is trying to close the game.
Phantom Point is weak when the end has already triggered, you are leading, the extra turn helps opponents more than you, or your row is only generally promising. Sacrifice does not undo an end trigger that has already happened.
Omen is usually the smallest score, but near the end 1 point can be decisive. It requires the non-Crown die to match the current Oracle Halo, so the Halo must be counted like a live resource. Omen clears your row, returns 3 Crowns, and then makes the Oracle judge every rival row. That can protect a narrow lead by dismantling a larger plan, but the returned dice can also refill the Pool and postpone an ending you wanted.
After an Omen scores, each Oracle face attacks a different structure. Crown removes every Crown-up Assembly Row die and passes the Oracle clockwise. A Halo sets the new Oracle Halo and removes every non-Crown row die bearing another Halo. Eclipse families are especially exposed because their required Halo diversity cannot survive a Halo result intact. A 3-Crown row becomes an Omen Blessing only if the first Oracle roll selects its lone non-Crown’s Halo; a Crown or any other Halo breaks it.
Seal is a duplicate-pair score: 2 Crowns plus 2 non-Crowns with the same Shape, same Dots, and same Halo. Near the end, Seal is strong when you already have or can preserve the matching pair. It gives 2 points, empties your row, returns 2 Crowns, and can decide the second tiebreaker.
Eclipse is the greatest score and wins the first tiebreaker: 1 Crown plus 3 non-Crowns with the same Shape, same Dots, all different non-Oracle Halos, and no Oracle Halo. If you are behind, Eclipse may be the only Sign that matters. If you are tied, one Eclipse may matter even more than row size.
Near the end, do not judge a row by whether it looks busy or flexible. Judge it by the exact missing face. A Seal needs an identical pair. An Eclipse needs the same Shape and Dots across three different non-Oracle Halos. An Omen needs the current Oracle Halo.
Player A
Player B
Player C
Only players with exactly 4 dice receive the final Astral Sign check.
If players are tied in points, first compare Eclipses scored. If still tied, compare Seals scored. Only then does the player with fewer dice remaining in Assembly Row win. Unfinished ambition can still matter, but it is the third tiebreaker.
If tiebreakers are your path to victory, track Eclipse count and Seal count before protecting row size. Avoid unnecessary Claims only after you know the Sign-count tiebreakers do not already decide the table.
A small row is not the crown until Eclipse and Seal counts fail to judge the tie.
Recast changes quality, not row size. If you have 3 dice before Recast, you have 3 dice after Recast. It may help create a score that later empties the row, but it does not itself reduce the row.
Near the end, denial becomes sharper. You are not only denying points. You are denying endings: leader scores, final-check setups, forced closures, comeback Eclipses, Seal-count tiebreakers, and row-size advantages after Sign counts.
The leader usually wants the game to end. The trailer usually wants more time. A tied player may want the end if they lead on Eclipses, Seals, or only then row size. A 4-dice row wants a final check only if it already matches a precise Sign. Once you know who wants the ending, you know who your move helps.
You lead by 1. The Pool has 5 dice in a 4-player game; the End Limit is 4. The player to your left has a strong 3-dice Eclipse setup, such as a Crown plus two matching Shape-and-Dot dice with different non-Oracle Halos, but not 4 dice. You Claim a harmless die, the Pool drops to 4, and they receive no final check.
You did not Claim for beauty. You Claimed for closure.
You lead by 1 with the Pool at 5 in a 4-player game. An opponent has 4 dice already showing a valid Seal, perhaps because a recent Parley formed it after their last turn: 2 Crowns plus 2 identical non-Crowns. You Claim, drop the Pool to 4, and trigger the end. Their final check scores 2 and passes you.
You are behind by 2. The Pool is at 5 in a 4-player game. Your row is one die away from Eclipse: 1 Crown plus two non-Crowns with the same Shape and Dots but different non-Oracle Halos. You need one more matching Shape-and-Dot die with a third non-Oracle Halo. The next player could Claim and end the game. You take a non-count-reducing action such as Stir the Pool, then after your action and any Sign check, you Sacrifice 1 point. Returning a die to the Pool may buy the extra turn needed for Eclipse.
You and another player are tied in points, Eclipses, and Seals. You have 1 die in row; they have 3. The Pool is near the End Limit. Claiming a speculative die reduces your third-tiebreaker advantage. Stirring to deny their finisher may be better.
Row size matters only after Eclipse count and Seal count fail to break the tie. Near the end, a player with a larger row may still be ahead if they have scored more Eclipses or Seals. Count Sign history before you protect a small row.
Beginners keep playing the same way near the end. Experts count the Pool, rows, final checks, tiebreakers, exact Sign patterns, and whether Sacrifice buys time or burns hope.
Near the end, ask:
What is the Pool count?
What is the End Limit?
Will my action trigger the end?
Who has exactly 4 dice?
Who wins tied scores by Eclipse count?
If still tied, who wins by Seal count?
If still tied, who wins by row size?
Do I need points, denial, or closure?
Should I Sacrifice before the trigger?
The player ahead and the player behind are playing different games.
Astral Assembly changes shape depending on the score. The rules do not change. The correct strategy does.
The leader wants control. The trailer wants useful volatility. The leader wants the table smaller, safer, and more predictable. The trailer wants the table to reveal or preserve the exact lanes that can still change the result.
Leader and Trailer Modes is the discipline of changing your appetite according to your position.
The question is not only “what is the best move?” It is “what kind of game do I need this to become?”
Leader Mode is the strategy of preserving advantage. When you are ahead, you do not need the most beautiful score. You need the score, denial, row size, and endgame timing that keep you ahead.
The leader’s greatest enemy is generosity: generous Parley, risky Shift, unnecessary Sacrifice, and chasing dead Eclipse lanes can reopen a game already leaning in your favor.
Trailer Mode is the strategy of creating a comeback. When you are behind, safety may be a disguise for defeat. If the game ends with the current rhythm, you lose. That means you must change the rhythm.
A safe move that leaves you behind is not truly safe. It is merely quiet.
Protect the lead.
Deny live Eclipse lanes.
Take safe points.
Avoid risky Shift.
Avoid generous Parley.
Manage row size after Sign counts.
Close the game when closure favors you.
Create useful volatility.
Chase Eclipse only from a live Shape-Dot lane.
Parley aggressively.
Stir against the leader.
Consider Phantom Point Sacrifice.
Accept calculated risk.
Keep the game alive if more time favors you.
The same action can be correct for one player and wrong for another. A leader may see Omen as closure. A trailer may see it as too small. A leader may avoid Sacrifice. A trailer may need it to buy one more turn.
Expert play begins when you ask whether a move is good for your position, not merely good in isolation.
Because Eclipse and Seal decide ties before row size, a Sign can matter even when the point total does not immediately change the leader.
Before your turn, know who is leading, by how many points, who is tied, who leads on Eclipses, who leads on Seals, who wins row-size only if those Sign-count tiebreakers remain tied, who needs Eclipse to catch up, who only needs Omen to pull ahead, and who has points vulnerable to Blessing in Disguise.
The score pile is not just a record of the past. It is a map of what each player must do next.
Astral Signs are selective. Omen depends on the current Oracle Halo. Seal needs an exact twin. Eclipse needs the same Shape and Dots across different non-Oracle Halos.
That makes Shape-Dot identity the center of the board. Sun-2, Moon-4, Star-1, and similar identities are lanes. Halos determine whether a lane points toward Omen, Seal, Eclipse, or nothing yet.
Leaders should deny live lanes. Trailers should commit to them. A Crown beside two Sun-2 dice with different non-Oracle Halos is a real Eclipse threat because one missing Sun-2 non-Oracle Halo can complete it. One Sun-2 die beside two Crowns is Seal pressure only if the exact twin exists or can be found.
The question is not only “is this a good die?” It is “which lane does this die make live?”
Protect the lead, deny live Shape-Dot lanes, avoid swing opportunities, take safe scores when they matter, manage the End Limit, track Eclipse and Seal counts, keep row size low only after Sign-count tiebreakers are considered, and avoid unnecessary volatility.
The leader should especially fear live Eclipse lanes, not random three-die clutter. A Crown beside two matching Shape-and-Dots dice with different non-Oracle Halos is dangerous because one missing non-Oracle Halo can become a 3-point score and a tiebreaker advantage.
Find a scoring swing, commit to a live Shape-Dot lane, build toward Eclipse only when the lane is real, use exact-twin Seal if it meaningfully closes the gap, Stir against the leader, Parley for exact finishers, create multiple threats, and consider Sacrifice before the end trigger.
Do not chase Eclipse from unrelated dice. An Eclipse plan starts with a shared Shape-Dot identity, not with variety.
Middle position is dangerous because it tempts unclear play. Ask whether you can catch the leader with Seal, whether you need Eclipse, whether the trailer is the real threat, and who benefits if you deny, score, or end the game.
The most common leader mistake is continuing to chase high-value scores after the lead is established. Sometimes the leader should take Seal, take Omen, Stir, or Claim only to trigger the end or deny the trailer.
Grandeur is for players who can afford time. Leaders often cannot.
A trailer can make legal, clean, safe moves that do not alter the likely result. If you are behind by 3, a 1-point Omen is not a comeback unless it creates a specific endgame advantage.
A quiet loss is still a loss.
A score can be safe and still wrong. A score can be risky and still necessary. Ask whether this score changes who is likely to win.
Omen becomes more valuable when you are leading because it can add a decisive point, clear a Crown-heavy row, and submit every rival row to the Oracle before a trailer completes Eclipse. Crown faces strip stored Crowns; the chosen Halo strips incompatible non-Crowns.
But Omen is not pure closure. The Oracle may return many dice to the Pool, preserve an opponent’s matching-Halo Omen route, or create a Blessing in Disguise. Score Omen when the point and targeted disruption are worth reopening the market.
Omen can be more than a small score for a trailer when the leader’s row is vulnerable to the Oracle. Use it when the current Oracle Halo is present and the point, row purge, delayed ending, or Blessing risk can change the winner. Do not take Omen only because it is available: the Oracle may scatter your allies’ comeback rows, refill the leader’s market, or bless a rival Omen bait.
Shift is dangerous for a leader because Blessing in Disguise can give an opponent points and take dice from your score pile.
Leader warning: risky Shift can reveal the missing Shape-dot-Halo face and turn your lead into their Blessing.
A trailer can accept more Shift risk, but risk must still be purposeful. A good trailer Shift creates or protects a live lane, threatens Blessing pressure, or disrupts the leader’s exact finisher. A bad trailer Shift simply crowns the leader.
A leader should Parley carefully because Parley creates motion. Motion often helps players who need change. Do not give away a current-Halo Omen die, exact Seal twin, or missing Eclipse Halo unless the trade denies something worse. When ahead, the safest bargain is often silence.
A trailer should Parley more aggressively to access exact finishers: the current-Halo Omen die, the exact Seal twin, or the missing Eclipse Halo. Parley can also cooperate against the leader, create multiple threats, and turn another player’s unused die into a comeback when you have a real die to offer in return.
Trailer play: seek the swing that can still change the winner.
Targeted Stir is excellent for leaders. It changes the Pool without increasing row size, removes current-Halo Omen dice, exact Seal twins, and missing Eclipse Halos. Random Stir is less safe because Sign math rewards exact identities. You may accidentally create the lane a trailer needs.
A trailer Stirs to create useful volatility, but useful volatility is not random noise. If your row has a live Shape-Dot lane, Stir to find the exact Seal twin or the missing Eclipse Halo. If the current Pool favors the leader, change it. If the leader has a safe Claim, reroll it.
A leader should rarely Sacrifice. It costs a point and usually gives the table more time and material. Do not pay points to give enemies another chance unless the alternative is worse.
A trailer should consider Sacrifice when the end is approaching and time is more valuable than the lost point. Burn points only to buy a future, not to avoid admitting the present.
Watch current-Halo Omen, Eclipse counts, and Seal counts.
Watch exact-twin Seal threats and Blessing swings.
Watch live Eclipse lanes and Blessing swings above all.
Omen, Seal, or Sign-count tiebreaker play may be enough.
Seal may be enough. Eclipse may be better.
You likely need a live Eclipse lane, Blessing swing, multiple scores, or leader error.
A leader often wants a smaller row near the end only after points, Eclipses, and Seals remain tied. A trailer may accept a larger row if it creates a real final Sign chance or changes the Sign-count tiebreakers.
Near the end, unfinished dice can decide tied scores only after Eclipse and Seal counts remain tied.
The final Astral Sign check is especially important for trailers. A trailer with exactly 4 dice may still score after the end trigger. The leader fears final checks. The trailer may live by them.
Leaders often become cautious; trailers often become reckless. The best trailer makes the leader feel time slipping away. The best leader makes the trailer feel every door closing.
You lead by 1. Your row has Crown, Crown, Crown, and a Sun with the current Oracle Halo. You score Omen, gain 1 point, and empty your row. The Oracle then strips Crown-up dice or nonmatching-Halo dice from rival rows. If the nearest trailer’s Eclipse engine is scattered and the enlarged Pool does not cost you the ending, the small score closes like a large one.
You lead by 2. A trailer has Crown, Sun-2 Round, Sun-2 Square, and a turnable die. You Shift the turnable die and reveal the missing Sun-2 Halo. They score Eclipse as a Blessing in Disguise and take dice from your score pile. You chose volatility while leading.
You are behind by 3. The leader is close to ending the game. Your row has Crown, Sun-2 Round, Sun-2 Square, and a spare die. Another player has Sun-2 Pentagon. You offer the spare die in Parley because Eclipse can erase the point gap and may also win the Eclipse tiebreaker. Safe Omen will not catch the leader.
You are behind by 3 and score Omen for 1. The leader remains ahead by 2, and the Oracle returns dice from rows that were helping other trailers while leaving the leader’s score untouched. Unless the Oracle judgment, delayed End Limit, or tiebreaker position creates a specific benefit, the score is too small.
Beginners ask what the best Sign is. Experts ask what Sign their position requires. Leader and Trailer Modes are how you stop playing one generic game and start playing the game you are actually in.
Before choosing your action, ask:
Am I leading, tied, behind, or in the middle?
Does the game ending help me?
Do I need safety or useful volatility?
Which Shape-Dot lanes are live?
Who has the exact twin or missing non-Oracle Halo?
Is Omen enough?
Is Seal enough?
Do I need Eclipse?
Should I deny, score, delay, or close?
Chasing grandeur when safe closure would win.
Taking small safe scores that do not change the outcome.
Every turn should pass through judgment.
Astral Assembly is full of tempting moves. A Crown glows in the Pool. A Star appears with the right number of Dots. An opponent leaves a weak row exposed. The hourglass falls.
A beginner chooses the first move that looks useful. An expert uses a system.
The Expert Decision System is a disciplined order of questions that turns a chaotic table into a sequence of judgments. It does not remove instinct. It sharpens it.
A move that serves no purpose is not strategy. It is ornament.
The system decides what matters first. Scoring this turn is usually more important than building later. Denying an opponent’s ready Sign may be more important than improving your own weak row. Stir may look passive, but may be the strongest move if the Pool favors the next player.
The Signs are exacting. A strong row is not any row with a Crown and promising symbols. Eclipse wants same Shape and same Dots with Halo diversity, Seal wants exact twins, and Omen wants the current Oracle Halo.
The expert’s first task is to know what kind of turn has arrived.
Most mistakes are caused by wrong priorities: Claiming while ignoring a ready Seal, chasing Eclipse when a safe score already wins, scoring Omen without mapping the Oracle’s row judgment, Stirring when you could score, Recasting when Claim completes, Shifting without Blessing risk checks, or adding a die near the end and losing the tiebreaker.
The move may look reasonable in isolation. The priority is wrong.
Before your turn begins, know:
My scoring plan.
My building plan.
My defensive plan.
My likely Recast target.
The most dangerous Pool die.
The next player’s best Claim.
The current Oracle Halo.
My Eclipse and Seal counts.
Each opponent’s Eclipse and Seal counts.
Whether scoring Omen would help me, or help the table.
Which row dice each Oracle face would return.
Whether the End Limit is near.
Whether Sacrifice matters.
The hourglass is for execution, not discovery. The Oracle Halo, tiebreaker counts, vulnerable row faces, and dangerous finishers should already be in your head.
Start with the richest Sign. Eclipse scores 3 points and needs exactly 1 Crown plus 3 non-Crowns with the same Shape and same Dots, with Halos that are all different and no Oracle Halo. Do not delay a real Eclipse because you imagine a cleverer future.
Do not chase Eclipse blindly if the finisher is not visible, the End Limit is near, you are already leading and a safe score wins, the table can easily deny your die, or endgame tiebreaker math matters more.
If Eclipse is not available, look for Seal. It scores 2 points and depends on exact twins: same Shape, same Dots, same Halo. If you have the duplicate and the second Crown, do not leave that pair exposed unless Eclipse is clearly coming soon.
The system does not ask only whether you can score Omen. It asks whether the point and the Oracle judgment are worth what follows. Count which Crown-up dice would be lost on a Crown, which non-Crowns would survive each Halo, how many dice may return to the Pool, and whether an opponent’s Omen bait could become a Blessing. Omen does not help your Eclipse or Seal tiebreaker count, so score it for points, targeted disruption, tempo, or the ending—not out of habit.
If you cannot score, look for your strongest future. A good Eclipse engine has 1 Crown and non-Crowns that share Shape and Dots while leaving space to complete all-different non-Oracle Halos.
Because Eclipse requires same Shape, same Dots, three different non-Oracle Halos, and no Oracle Halo, do not call every Crown-plus-two-dice row an Eclipse engine. It is only an Eclipse engine if the non-Crowns already share Shape and Dots, and the missing non-Oracle Halo is realistic.
If your Eclipse engine stalls, ask whether you already have, or can claim, exact twins, and whether a second Crown is visible. A near match is not a Seal plan. Do not let loyalty to a 3-point idea cost you a 2-point reality.
If scoring and direct building are not available, look at Crown control. Every Sign needs at least 1 Crown, Seal needs 2, and Omen needs 3. Claiming a Crown can build your row, deny an opponent, or delay an Omen. But scored Omen Crowns return to the Pool, and a Crown on the Oracle empties every Crown-up Assembly Row die, so do not treat Crown scarcity as permanent.
If you cannot create strong value for yourself, prevent value you must not allow. Claim their finisher, Stir the dangerous Pool die, Recast while taking what they need, Parley to move a key die, or Shift only if Blessing risk is controlled. Denial means checking exact finishers: the missing non-Oracle Halo for Eclipse, the matching twin for Seal, the needed Crown, and the current Oracle Halo die for Omen. With 48 dice in the game, do not waste turns denying vague possibilities. Deny visible finishers and immediate threats.
If no score, build, pivot, Crown control, or denial is decisive, make the next player’s turn harder: act quickly, Stir, remove obvious Claims, offer a real Parley, or leave a messy market. Pool size matters too. With 48 dice, early Pool changes are less decisive, but near the End Limit every die removed or returned can change the ending. An Omen can create the largest sudden return by casting Crown-up or nonmatching-Halo dice from every Assembly Row into the Pool.
Shift appears late because it is powerful and dangerous. Ask what you are trying to change, whether another action is safer, whether Blessing in Disguise can punish you, and whether you are acting from strategy or frustration.
Near the end, the best move may not be the highest-value Sign. Pool count, End Limit, final checks, score total, Eclipse count, Seal count, row size, and Sacrifice may override normal priorities.
Sacrifice is useful when the end has not triggered, you are behind, you have a realistic scoring path, and the lost point buys a future. If you cannot name the future, do not Sacrifice.
Complete a Sign.
Improve future structure.
Fix bad architecture.
Stop an opponent’s score.
Weaponize time and Pool state.
Play for closure, final checks, Eclipse count, Seal count, and tiebreakers.
Bank points.
Create a stronger future.
Remove an opponent’s best future.
Make the next player’s turn harder.
Create the winning ending.
A move with no purpose is usually a mistake. A move with two purposes is usually strategy. Oracle volatility and tiebreaker position are not separate instincts. They are part of pressure and closure.
Some moves feel clever but do not matter: dramatic Shift, revealing Parley, decorative Recast, handsome but dirty Claim, or Sacrifice without a comeback path. Astral Assembly has enough ceremony already. Your moves must be useful.
Your row has Crown, Sun Round 2, Sun Square 2, and an empty slot. The Pool contains Sun Pentagon 2, Crown, Moon Wavy 1. Step 1 answers yes: Claim the Sun and score Eclipse.
Your row has Crown, Sun Round 2, Sun Round 2, and an empty slot. Eclipse is not available. Seal is, because the two non-Crowns are exact twins. Claim the Crown and score 2 points.
You cannot score and your build is modest. The opponent to your left can claim Sun Pentagon 2 and score Eclipse with their Sun Round 2 and Sun Square 2 engine. The system reaches denial.
You lead by 1 and are ahead on Eclipse count. The Pool has 5 dice in a 4-player game. End Limit is 4. The next player has a 3-dice Eclipse engine but no final-check row. Claim a harmless die and force the end.
Your row has Crown, Sun Round 2, Sun Square 2. The Pool contains Crown and Sun Pentagon 2. You are tempted by the Crown, but the Sun completes Eclipse. A lower-priority temptation must not distract from a higher-priority score, especially when Eclipse also matters for tiebreakers.
Your row has three Crowns and an empty slot. The current Oracle Halo is Wavy. The Pool contains Sun Round 4 and Moon Wavy 1. The Round die may look stronger, but it does not complete Omen. If Omen is your plan, the Wavy die is the only valid finisher.
Your row can score Omen for 1 point, but you are tied on points and behind on Eclipse count. Scoring it returns your three Crowns, then the Oracle may scatter the Eclipse row you need to overtake the tiebreaker, refill the Pool, or bless another player’s Omen bait. If the judgment does not create a concrete advantage, the point may not be worth the volatility.
Beginners act from attraction. Experts act from priority. The beginner asks what they can do. The expert asks what the turn must accomplish.
Before acting, ask:
Is this move scoring?
Is it building?
Is it denying?
Is it pressuring?
Is it exploiting the Oracle or Oracle Halo?
Is it improving my Eclipse, Seal, or endgame tiebreaker position?
Is it closing?
If the answer is none, choose again.
If two moves serve the same purpose, choose the one that also serves a second purpose.
Main question: How do I build without trapping myself?
Claim 1 Crown, claim clean non-Crowns, read the dots, and keep Eclipse open while watching who can invoke the Oracle first.
Create an Eclipse engine without becoming trapped by it.Main question: Is my plan still alive?
Use Recast to repair bad rows, Claim a second Crown if Seal is available, Stir when the Pool favors others, Parley for exact finishers, and map what each Oracle face would remove.
Convert potential into points before your row becomes stale.Main question: Do I need points, Sign-count tiebreakers, denial, or closure?
Track points, Eclipses, Seals, row size, current Oracle Halo, vulnerable row faces, final checks, and Pool count before choosing the ending.
Win the actual ending, not the theoretical perfect score.An expert in Astral Assembly plays six games at once:
Start as an Eclipse builder, pivot like a Seal player, judge like the Oracle, defend like a market controller, and close like a mathematician.
The Privilege of the Table
Today, the old traditions of Astral Assembly are rare.
Cheap copies may be poured from plastic and stamped by factories, but no player who respects the table mistakes such things for a true set. They may hold dice. They do not hold the game.
A proper set is not bought in haste.
It is commissioned.
The player writes to a craft master. Materials are discussed. The case is chosen. The wood is weighed. The hourglasses are selected. The size, sound, color, and temperament of the set are considered before a single die is carved.
For the finest players, the question is not simply what the set will cost.
The question is whether the set will be worthy of the games it must witness.
Plastic chatters.
Wood speaks.
Cheap glass measures time.
A worthy hourglass judges it.
Every commission begins with choices.
Not cosmetic choices.
Ceremonial ones.
A travel roll for quiet games. A rigid leather case for the serious table. A ceremonial chest for those who believe the opening of the set should silence the room. Matching score pouches may be fitted for tables that keep the Veiled Score.
Maple for clarity. Walnut for patience. Ebony for midnight. Olive wood for living grain. The 48 Astral dice must be readable at a glance, and the Oracle die must make its four Halo faces and two Crown faces unmistakable. The Halos, including Wavy, must be distinct.
One glass may serve the table. One per player is the modern mark of taste. Choose the time, the sand, the frame, and the judgment you wish to place beside every turn.
The visible symbols are only the surface. The true arrangement of the Astral dice faces, known among craft masters as the Celestial Pattern, is never written in public. The Oracle die is separate, and its two Crown faces and four Halo faces are public knowledge. A factory may copy a Crown. It cannot copy inheritance.
Known by craft masters. Never printed in full.
A fine set is not taken from a shelf. It is granted, shaped, argued over, and finally delivered like a small inheritance.
Those who seek a proper set may begin with an inquiry to the Registrar. Describe the table you imagine, the wood you favor, the hourglass you fear, and the silence you want the case to create when it opens.
Commissions are personal. No two worthy sets are entirely alike.
The Craft Tradition
In the earliest days, no two sets of Astral Assembly were truly alike. A prince’s set might rest in a cedar chest lined with blue velvet, its dice carved from black walnut and polished until they seemed wet with starlight. A cardinal’s set might be kept in a red leather case, sealed with brass, and opened only after supper, when the candles had burned low and the room belonged to ambition. A French courtier might carry a smaller travel set, delicate enough to fit beside perfume, letters, and other dangerous instruments.
To possess a set was never merely to own a game. It was to be admitted into a tradition.
In modern times, the old methods have become rare. There are, of course, imitations. Cheap copies appear from time to time, poured from plastic, stamped in haste, packed into bright boxes, and sold as though Astral Assembly were a common pastime. Such sets may contain dice. They may even contain Crowns, Suns, Moons, and Stars.
But they do not contain the game.
Plastic chatters. Wood speaks. Cheap glass measures time. A worthy hourglass judges it.
Today, those who seek a proper set must turn to the craft masters of the Astral community. They are not merchants in the ordinary sense. They do not simply sell. They listen. They ask questions. They measure the player before they measure the wood.
How many will gather at your table? Will your games be swift and cruel, or long and ceremonial? Do you favor a travel case, discreet and severe, or a grand case worthy of being opened before guests? Do you want your dice light in the fingers, or heavy enough to make every Claim feel like a declaration?
Only after such questions does the negotiation begin.
The symbols upon the Astral dice are visible to all. Any fool can carve a Sun, a Moon, a Star, or a Crown. But the true arrangement of those symbols upon the six faces of each Astral die, the hidden architecture beneath the game, is a secret passed from master to apprentice across generations. The Oracle die is separate: its four Halo faces and two Crown faces are public knowledge and are not part of the scoring pattern.
According to tradition, the distribution was refined over centuries of play in courts, monasteries, and noble houses. Every face placement, every neighboring symbol, every relationship between one side and the next was adjusted, tested, and balanced until the game achieved its present form.
The craft masters call this knowledge the Celestial Pattern. It is never written in public.
The first matter is often the case. A humble set may be kept in a simple leather roll, dark and practical, suitable for travel, taverns, and sharp games played without ceremony. A finer set may rest in a rigid leather case, stitched by hand, fitted with compartments for dice, hourglasses, scoring cases, and folded rules.
The greatest cases are made to sit open on the table like reliquaries. Some are lined in velvet. Some are clasped in brass. Some carry a family mark, a private motto, or the owner’s chosen Astral Sign pressed into the lid.
The 48 Astral dice are the heart of the set, and the Oracle die is the voice that names the Oracle Halo. Maple is pale, clean, and scholarly. Walnut is darker, warmer, and more severe. Ebony, when available, is reserved for those who want their dice to look as though they were carved from midnight itself. Olive wood is prized in certain old circles for its living grain, which seems almost celestial when polished.
The finest dice are not merely engraved. They are cut, inked, polished, and balanced by hand. The Sun, Moon, Star, and Crown must be clear at a glance, but never crude. The Halos, including the Wavy Halo, must be distinct. The dots must be honest. The Oracle’s Halo and Crown faces must be unmistakable, but the Oracle itself is never rolled into the Celestial Pool.
No set is complete without time. In older houses, a single hourglass was placed beside the table, and all players submitted to it equally. Modern tradition is more generous and more theatrical. A proper set commonly includes one hourglass per player.
Ten seconds for duels of instinct. Thirty seconds for sharp courtly games. One minute for thoughtful rivalry. Two minutes for those who believe strategy should be allowed to breathe before it is strangled.
To commission Astral Assembly is to enter a negotiation of materials, price, patience, and pride. The buyer may request a compact scholar’s set, a noble table set, or a ceremonial set large enough to dominate a room and heavy enough to make every roll sound like a small thunderclap.
A true commission is not obedience. It is conversation. And when the set is finished, it is not simply delivered. It is presented.
Those who seek a true set of Astral Assembly do not write directly to the craft masters. Their names are not published. Their workshops are not advertised. Their waiting lists are not displayed for the curious. Since the old days, the identities of the craft masters have been protected by the Registrar, keeper of the private Registry of the Astral community.
The Registry is one of the community’s most carefully guarded trade secrets. It records which masters still practice the old craft, which materials they favor, which commissions they accept, and which traditions they are trusted to preserve. Some are known for dice of unusual balance. Some for leatherwork fit for a royal table. Some for hourglasses so fine that even the falling sand seems disciplined.
To contact the Registrar is not to place an order. It is to request consideration.
The Registrar receives each inquiry, studies the desired commission, and decides whether it should be brought before a craft master. Only if the request is serious, respectful, and worthy of the tradition will an introduction be made.
This custom protects the masters. It protects the Celestial Pattern. It protects the dignity of the game itself.
To request consideration for a commissioned set, write to: registrar@astralassembly.com
Suissa Family Seal
The Registry is not kept by one person alone. Across the years, its care has passed through a small circle of trusted houses, each sworn to protect the names of the craft masters and the secrecy of the Celestial Pattern.
Among the honorable families sometimes associated with this duty is the Suissa Family, whose old seal shows a watchful owl beneath an hourglass. In Astral tradition, the owl is said to represent memory, silence, and the careful guarding of what should not be spoken too freely.
Such seals are rarely displayed and never explained in full. They appear only as quiet marks of trust, reminding those who seek a commission that the path to a craft master is not a marketplace, but an inheritance guarded by patient hands.
A fine set of Astral Assembly is not necessary for play. But neither is a crown necessary for a king to have a head.
The finest players understand that the object shapes the ritual. The weight of the dice changes the hand. The sound of the roll changes the room. The hourglass changes the breath. The case changes the moment before the game begins.
A poor set asks, “Shall we play?”
A true set asks a better question: “Are you worthy of the table?”
A poor set asks, “Shall we play?”
A true set asks, “Are you worthy of the table?”
The Customs of Different Tables
No noble game remains unchanged as it passes from hand to hand.
In Rome, the game was whispered over.
In England, it was argued over.
In France, it was performed.
So it is with Astral Assembly today. The official rules are the law of the table, but many circles keep small customs of their own: ways of naming the game, turning the hourglass, announcing an action, arranging the first Pool, or honoring the player who hosts the set.
These traditions do not replace the rules.
They dress the table.
Before any custom is used, all players should agree to it aloud. A tradition accepted after the game begins is not tradition. It is politics.
Official rules take precedence. Use traditions and variants only when every player agrees before setup.
In some places, the game is called Astral Assembly. In others, particularly among older houses, it is called Astral Array.
The difference is mostly ceremonial. Assembly speaks of the act: building the Sign by hand. Array speaks of the arrangement: the hidden order of dice, halos, dots, and Crowns.
Some tables use both names. They call the game Astral Assembly when teaching new players, and Astral Array when speaking of older sets, rare commissions, or the craft masters’ hidden Celestial Pattern.
At formal tables, the host may announce both names before the first roll: “Tonight we play Astral Assembly, known in certain courts as Astral Array.”
The oldest tables are said to have used a single hourglass. It stood beside the Celestial Pool, belonging to no player and judging all equally.
There is only one measure of time. There is only one falling judgment.
Use one shared hourglass for all players. Place it beside the Celestial Pool. The player to the right of the active player turns it at the beginning of the turn.
Formal games, slow ceremonial tables, and players who enjoy strict ritual.
Modern players often prefer one hourglass per player. Each player chooses or receives a glass before the game begins.
A table with many glasses looks richer, but also more dangerous. Each player sits beside their own sentence of sand.
Each player has an individual hourglass. The chosen turn time must still be agreed upon before the game begins unless the table is intentionally using different times as a handicap or ceremony.
Luxury sets, gallery tables, and games where the hourglasses are part of the visual ritual.
At some tables, a player must announce their chosen action before touching any die. This is known as the Court Announcement.
On your turn, say the action aloud before touching dice: “Claim.” “Recast.” “Shift north.” “Parley.” “Stir the Pool.” For Shift, the chosen table direction should be spoken before any die is touched. Once announced, the action must be completed if legally possible.
Serious tables, tournament-like play, and groups that enjoy ceremony and clarity.
Some players prefer a quieter table. Under the Silent Assembly custom, players may speak only when required by the game.
No advice. No table talk. No warnings. No theatrical sighs when a rival misses a Sign. Silence makes the dice louder.
Limit speech during active turns. Players may speak only to perform or clarify legal game actions.
Tense games, two-player duels, and players who want the table to feel severe.
Before setup, the host places one Astral Crown die in the center of the empty table. This is called the Host’s Sign.
The gesture is symbolic. This table is opened. This set is offered. The Crown belongs to no one yet.
Before setup, the host places an Astral Crown die at the center of the table. This is not the Oracle die and does not set the Oracle Halo. After the opening moment, it is rolled with all other Astral dice into the Celestial Pool.
Commissioned sets, formal evenings, and introducing new players to the ritual of the game.
Some houses keep an extra large die beside the set. Its faces show only Crowns and dots, numbered one through six.
This is the House Crown. It belongs to the table, not to any player, and it is not the Oracle die.
Before setup, roll the House Crown to determine who starts the game. The result is read the same way as the standard starting roll. After the first player is chosen, set the House Crown aside. It is not rolled into the Celestial Pool and is not used during play. Still use the Oracle die normally to set the Oracle Halo.
Collector sets, house tables, and groups that want the first turn chosen by a dedicated ceremonial die.
Some tables keep a written record of every Astral Sign scored during a game. Not every move. Not every mistake. Only the Signs.
This custom is not required by the official rules, but it is highly common in official games because it keeps Eclipse and Seal tiebreakers clear when the endgame is close.
Place a small record card or notebook beside the rules. Each time a valid Sign is scored, write down the player, Sign type, and points scored. At minimum, keep a running count of each player’s Eclipses and Seals so tiebreakers can be settled quickly and without argument.
Official games, tournament nights, long-running groups, collectors, and tables that want close endings resolved cleanly.
At some tables, victory is announced once and then hidden. Each scored die disappears into a pouch, leaving every player responsible for remembering what the room has witnessed.
The attentive know the score. Those who let the count slip must wait for the final revelation.
Give each player an opaque score pouch before setup. Whenever a Sign scores, announce its name and points, then place its scored dice in the pouch. The Pool and Assembly Rows remain public; only scored dice are concealed. Do not recount a pouch during play. Resolve Sacrifice, False Sign penalties, and Blessing in Disguise by drawing or transferring the required dice without displaying the rest. Keep Eclipse and Seal counts on a separate face-down record. At the end, empty every pouch, count the points, and reveal the Sign records. Dice moved by Blessing, Sacrifice, or a penalty change point totals but do not change which player originally scored an Eclipse or Seal.
Attentive groups, memory play, ceremonial tables, and sets with leather score pouches.
In some houses, the first question is not asked by the first player. It is asked by the host.
The host opens the table, casts the first omen, and gives the game its first Halo before any player begins the struggle for Signs.
During setup, after the starting player has been chosen, the host begins the Oracle sequence. If the Oracle shows a Crown, no Halo is chosen and the next player clockwise rolls. Continue until a Halo face appears; that Halo becomes the first Oracle Halo. Assembly Rows are empty, so opening Crown results return no dice. This custom affects only who begins the opening Oracle sequence. After any player scores an Omen, resolve the Oracle normally according to the official rules.
Hosted games, formal tables, collector sets, and ceremonial openings where the host is treated as keeper of the table.
At some tables, scored dice are not left showing the faces that won them. Each player turns scored dice to show the symbol of their house, if their coat of arms, house symbol, or house seal contains a Sun, Moon, or Star.
Players with no such symbol usually turn scored dice to show a Crown. The meaning is ceremonial. A die that has scored has already served its Sign. It now bears the player’s house, seal, or victory.
When a player scores an Astral Sign and moves non-Crown dice to their score pile, they turn each scored die to show their house symbol if it is a Sun, Moon, or Star. If their house has no Sun, Moon, or Star symbol, they turn each scored die to show a Crown. If more than one symbol applies, the player chooses one before the game and uses it consistently. This does not change the number of points scored, the Sign that was scored, or any tiebreaker record. Scored dice are still out of the game unless a rule later returns them to the Celestial Pool.
Ceremonial tables, house games, collector sets, and players who want score piles to show personal banners of victory.
All players use the same turn duration, usually 30 seconds, 1 minute, or 2 minutes. This is closest to standard play and is recommended for most groups.
Before the game begins, all players agree on one turn duration. Every player uses the same time limit.
First games and balanced play.
New players receive a longer timer than experienced players, allowing them to learn symbols and Signs without being crushed by the hourglass too early.
New players may receive up to twice the time of experienced players. All players must agree before setup.
Teaching games and mixed experience groups.
All players use a short timer. Ten to thirty seconds creates a sharp, almost brutal game. Mistakes become common. Sabotage becomes real.
Use a short shared turn duration, usually 10, 15, or 30 seconds.
Experienced players, fast games, and tables that enjoy pressure.
Instead of rolling all dice quickly into the Pool, players roll in order around the table, one handful at a time.
This makes setup slower and more theatrical. It lets the Celestial Pool appear gradually, like a sky filling with stars.
During setup, each player rolls their starting dice into the center one at a time in clockwise order. Once all dice are in the Celestial Pool, the game begins normally.
Formal games, photography, first games with a new set, and lore-focused tables.
Players must identify the Astral Sign they are calling, adding memory pressure and pattern recognition without changing any official Sign requirements.
When a player calls “Astral Sign!”, they must immediately name the Sign type: Omen, Seal, or Eclipse. If the Assembly Row is valid but the player names the wrong Sign type or fails to name one, score the Sign normally. Then that player must immediately Sacrifice 1 point if possible.
Experienced players, faster games, and ceremonial tables.
Players must act with ritual precision. Once a player touches a legal die for their chosen action, that die is committed.
During a legal action, the first die you touch for that action is locked in as your chosen die, if that die can legally be used for that action. You may not switch to a different die after touching it. Touching a die illegally is still handled by the official Table Rule.
Ceremonial tables, competitive players, and groups that want cleaner, more deliberate turns.
Players must watch their own Assembly Row carefully. A valid Astral Sign that goes uncalled may be noticed by the stars before the next turn begins.
If a player ends their turn with 4 dice in their Assembly Row and does not call a valid Astral Sign, the next player may say "Unseen Sign" before starting their own timer. If the row is truly a valid Astral Sign, the player who missed it must immediately Sacrifice 1 point if possible. The missed Sign is not scored. If the row is not a valid Astral Sign, nothing happens.
Experienced groups, watchful tables, and players who want missed opportunities to matter.
At some tables, the first seat is not truly claimed until the Oracle answers. A player may win the opening roll, only to lose the right to begin when the Oracle shows a Crown.
The first true player is the one who receives the first Halo. Until then, the table is still waiting for the sky to choose its opening hand.
After the starting player is chosen by the normal starting roll, that player rolls the Oracle die. A Crown passes the Oracle clockwise and removes that roller’s right to begin. Continue until a player rolls a Halo face. That Halo becomes the first Oracle Halo, and the player who rolled it becomes the starting player. Assembly Rows are empty during setup, so opening Crown results return no dice. Play proceeds clockwise from the player chosen by the Halo.
Groups that want the opening of the game to feel less predictable, more ceremonial, and more strongly ruled by the Oracle.
In this variant, there is no single Oracle Halo for the whole table. Each player has their own Oracle die, and each player listens only to their own Oracle.
One player may seek the Wavy Halo while another waits for Round. The same sky is shared, but each player hears a different prophecy.
Each player needs an Oracle die. During setup, resolve each Oracle die separately, beginning with its owner; pass that die clockwise after every Crown until a Halo appears. That Halo becomes the owner’s personal Oracle Halo. A player’s Omen must match their own Oracle Halo, and their Eclipse must avoid it. When a player scores Omen, resolve that player’s Oracle die in the same way. Every Crown result still sends all Crown-up dice from every Assembly Row into the Pool. A Halo sets the owner’s personal Oracle Halo and sends all non-Crown row dice bearing another Halo into the Pool. For Blessing in Disguise, judge each Assembly Row against that row owner’s personal Oracle Halo. Oracle dice are never part of the Celestial Pool, cannot be claimed, and never score points.
Experienced groups, longer games, strategic tables, and players who want Omen hunting to become more personal and less predictable.
Large tables sometimes play with two Astral sets, or even more. A single sky can feel too small when many hands are reaching into it.
With 8 players, Assembly Rows alone can hold 32 dice once everyone has built a full row. In a single 48-dice set, that leaves only 16 dice in the Celestial Pool before any scoring, Sacrifice, or Crown return is considered. The result can be tense, but also crowded and restrictive.
The Grand Table gives large groups a wider sky. More dice means more visible choices, more denial targets, more strange Signs, and less pressure on the first few claims.
For large groups, especially 6 to 8 players, use two full Astral sets for a total of 96 Astral dice. For 9 to 12 players, use three full Astral sets. Use only one Oracle die unless another variant specifically says otherwise. Extra Oracle dice are set aside. Setup is otherwise unchanged: divide the Astral dice as evenly as possible among all players, then roll them into the Celestial Pool. When playing with multiple Astral sets, increase the End Limit by set count: two sets end at 8 dice or fewer in the Celestial Pool, three sets end at 12 dice or fewer, and so on.
Large groups, 6 to 12 player games, ceremonial gatherings, long tables, and groups that want the Celestial Pool to stay rich even after many players have built Assembly Rows.
Traditions give the table memory.
Variants give it temperament.
But the heart of the game remains unchanged: the Pool, the Row, the Crown, the Sign, and the sand.
Choose customs that honor the table. Refuse customs that confuse the rules. A noble game does not need many changes. It needs players who understand why even a small ritual can make the dice feel heavier.
The rules make the game fair. The traditions make it remembered.
Wood, Glass, Leather, and Silence
A true set of Astral Assembly is understood first by the hand and only later by the rulebook.
The grain of the dice.
The fall of sand.
The hush around the Crown.
The leather case opening like a private invitation.
These are not decorations. They are part of the ritual.
Every table tells the game differently. Some glow with candlelight and polished walnut. Some travel in worn leather beside letters, maps, and old promises. Some wait in silence until the hourglass is turned and the Celestial Pool is cast.
Look closely.
The Signs are already gathering.
The finest sets are not only played. They are kept, opened, studied, and remembered.
Clarity Before the First Roll
Every table has questions before the dice are cast.
Some are practical.
Some are ceremonial.
Some are asked only after a player has lost a Sign by one terrible dot.
The answers below are meant to guide new players, hosts, collectors, and the merely curious. For disputes during play, the Official Rules remain the final authority.
No answer found in the visible archive.
Basics
The standard game works for 2 players and scales up to 12 players.
The more players at the table, the more social and chaotic the Celestial Pool becomes. A two-player game feels like a duel. A four-player game feels like a court.
For very large groups, especially 6 to 8 players, some tables use the Grand Table Variant, playing with two Astral sets so the Celestial Pool stays rich even after many players have built Assembly Rows.
Game length depends on player count, timer length, and table style.
A short, sharp game with fast timers can move quickly. A ceremonial table with longer timers, negotiation, and careful play will naturally take longer.
Before the game begins, players choose a turn timer from 10 seconds to 2 minutes.
Yes.
A new player can learn the basic idea quickly: build a row of exactly 4 dice, include at least 1 Crown, match one of the three Astral Signs, use the current Oracle Halo for Omen, avoid it for Eclipse, and score the non-Crown dice.
The difficulty is not learning what the game asks. The difficulty is seeing the answer before the table changes.
It is a tactical social game.
Astral Assembly has open information, pattern recognition, timing pressure, negotiation, disruption, and memory. It can be played lightly, but it rewards careful eyes and sharp decisions.
At a quiet table, it feels like strategy. At a lively table, it feels like court politics.
Start with the quick flow: What Is Astral Assembly, The Three Astral Signs, How to Play, The Five Actions, and Official Rules.
Read the legend and craft sections when you want the world around the game to deepen.
A Crown carries zero dots.
If all players roll Crowns during setup, all players are tied at zero. The universe has refused to grant favor. The tied players reroll until one of them has the most dots.
Divide them as evenly as possible.
If there are leftover Astral dice, give the extra dice out by any fair method agreed before setup: randomly, clockwise from the first player, or by the host’s choice. Once everyone rolls the 48 Astral dice into the Celestial Pool, individual ownership disappears. The Oracle die is not divided and is not rolled into the Celestial Pool.
The dice begin in many hands, but they enter one sky.
Use 1 minute or 2 minutes.
Short timers create drama, but new players need time to learn Shapes, Halos, Dots, Crowns, the Oracle die, and the three Astral Signs. Once the table understands the symbols, shorten the glass.
For mixed tables, give new players the longer end of that range until they can read the Pool and Oracle Halo without stopping the game.
The faster the sand, the sharper the court.
If players are tied in points, first compare who scored the most Eclipses. If still tied, compare who scored the most Seals. If still tied, the player with the fewest dice remaining in Assembly Row wins. If still tied, tied players roll one die, and most dots wins. Reroll ties.
Rules
The Oracle die is a separate die with two Crown faces and four non-Crown Halo faces: Pentagon, Round, Square, and Wavy.
It sets the Oracle Halo during setup and is rolled again after Omen scoring. A Crown sends all Crown-up dice from every Assembly Row into the Pool, then passes the Oracle clockwise. A Halo becomes the Oracle Halo and sends all non-Crown row dice with another Halo into the Pool. The Oracle die itself is not part of the Celestial Pool, not an Astral die, and never used in Assembly Rows or Astral Signs.
No Oracle Halo is chosen.
Pass the Oracle die clockwise and keep rolling until someone rolls a Halo face. Assembly Rows are empty during setup, so the Crown has no row dice to return.
Yes.
When you Recast, return 1 die from your Assembly Row to the Celestial Pool and reroll it. Then take 1 die from the Celestial Pool. That die may be the same die you just rerolled.
Every player simultaneously rolls every Astral die showing a Crown from their Assembly Row into the Celestial Pool. Dice in score piles are not affected.
No Oracle Halo is chosen. The next player clockwise rolls the Oracle die, and the sequence continues until a Halo face is rolled.
At setup, and after any player scores an Omen. The first Halo face rolled becomes the Oracle Halo. Every player then rolls all non-Crown dice from their Assembly Row whose Halo does not match it into the Celestial Pool.
If that Oracle resolution causes an opponent’s remaining row to form a valid Astral Sign, resolve Blessing in Disguise.
Seal needs 2 Crowns and 2 identical non-Crowns: same Shape, same Dots, and same Halo.
Eclipse needs 1 Crown and 3 non-Crowns with the same Shape and same Dots. Their Halos must all be different, and none of those Halos may be the current Oracle Halo.
A Blessing in Disguise happens when your Shift or an Oracle resolution during your turn causes an opponent’s Assembly Row to form a valid Astral Sign.
If another player’s row becomes valid because of Parley, they may call it only on their own turn. If dice change because of a roll or a bump, follow the normal rules.
Resolve the Blessing first.
The opponent can immediately call and score their Astral Sign, then takes up to two dice from your score pile. If your score pile is empty, no additional dice are taken. After that, your Shift action is complete. Continue resolving your turn normally, including any required check of your own Assembly Row and your choice to Sacrifice or decline.
The table may admire the generosity of your mistake, but it remains your turn until your turn is fully resolved.
No.
A Shift must turn at least one die. If your Assembly Row is empty, there is nothing of yours to turn. You may still Shift one die in an opponent’s Assembly Row if that Shift is otherwise legal.
If no legal die can be Shifted, choose a different action.
Yes.
After you score an Astral Sign, the non-Crown dice from that Sign enter your score pile. When you reach the Sacrifice step at the end of your turn, those dice are part of your score pile and may be chosen.
If the Sign was an Omen, resolve the complete Oracle sequence first. After its Crown or Halo effects and any Blessing in Disguise are resolved, you may still Sacrifice during the Sacrifice step if your turn has not otherwise ended.
This is legal, but costly. You are returning fresh victory to the Pool and asking the stars to repay you later.
No.
If your timer reaches zero before your turn is finished, resolve Sabotage. After Sabotage, your turn ends. You do not check for an Astral Sign, and you do not Sacrifice.
The sand has already spoken.
Not immediately.
The end is triggered when the Celestial Pool has dice equal to or below the End Limit. Finish resolving the current action, Astral Sign and any Oracle sequence it causes, penalty, Sacrifice, or timeout effect. Then the game ends.
The Pool may cross the threshold during a turn, but the table does not collapse mid-breath. The current matter is settled first.
After the game end is triggered and the current effect is fully resolved, any player with exactly 4 dice in their Assembly Row checks for one final Astral Sign.
If the row is valid, score it normally: non-Crown dice go to the score pile, and Crowns return to the Celestial Pool. Omen uses the current Oracle Halo during final checks. If the row is not valid, it scores nothing.
This final check is the last mercy of the table. It is not another turn.
Yes, but the hourglass is strongly recommended.
A digital timer can function mechanically, but a physical hourglass fits the spirit of Astral Assembly. The visible fall of sand changes the room. It makes time part of the table.
Lay it flat on the table.
A Parley is a brief truce. By resting the hourglass on its side, the sand stops, and the pressure of the turn is suspended while the opponent answers.
Once the answer is given, stand the glass upright. Time resumes its flow, and the active player must complete the Parley or choose a different action if the offer was refused.
If your table uses a digital timer, pause it when Parley is offered and resume it as soon as the answer is given.
You pay what you can.
If your Shift completes an opponent’s valid Astral Sign, they can immediately call and score it as a Blessing in Disguise. After scoring, they take up to two dice from your score pile and add them to their own.
If you have only one scored die, they take one. If your score pile is empty, they take nothing. No debt remains for later. An empty treasury is poor protection, but protection all the same.
You turn all dice in your own Assembly Row.
When you Shift your own row, choose one table direction and tip every die in your Assembly Row one step in that same direction. This can transform a weak row into a sudden Sign, but it can also ruin what your hand had carefully gathered.
No.
When you Shift an opponent’s Assembly Row, choose one die in that row and turn only that die one step in the chosen table direction. You may not Shift the same opponent on two of your turns in a row.
Be careful. If your Shift completes their valid Astral Sign, they can immediately call and score it as a Blessing in Disguise, then take up to two dice from your score pile. Seal requires identical non-Crowns, Eclipse requires same Shape and Dots with all-different non-Oracle Halos, and Omen requires the current Oracle Halo.
Use the table direction, not a protractor.
Before touching the die, the active player chooses a direction relative to the table: forward, back, left, or right. Then the die is tipped one face in that direction as naturally as the table allows.
If a die is slightly angled, do not pause the game to measure it. Use the table’s natural consensus. What clearly looks like one step is one step. Do not lift, spin, align, or inspect the die before turning it.
The rules allow the timeout to resolve.
If your timer reaches zero, Sabotage triggers. If your Assembly Row is empty, there is no die to reroll, so nothing happens and your turn ends.
This is not a special Pass action and should not be treated as a normal way to play. It is simply a timeout with no target. Repeatedly letting the timer die is poor table conduct and usually fails to advance your score.
No.
A player may Sacrifice only by returning one die from their own score pile to the Celestial Pool. A player cannot Sacrifice dice they have not scored, and once their score pile is empty, they have nothing left to burn.
Also, the end of the game is triggered when the Celestial Pool has dice equal to or below the End Limit. Once that trigger has occurred, finish resolving the current action, Astral Sign, penalty, Sacrifice, or timeout effect. Then the game ends. Sacrifice does not undo an end that has already been triggered.
The rulebook gives the penalty. The table gives the judgment.
If a player illegally handles a die, act as if they called a False Sign. If the die changed face or position, the resulting face and position stand. The game does not reset.
But intentional mishandling is not a clever action. It is a breach of table honor. The penalty exists to keep the game moving after a mistake, not to offer desperate players another tool.
No.
A valid Astral Sign requires the correct ingredients, not a specific sequence. Whether your Crown sits at the far left or in the center, its authority is the same. The row is a vessel holding your dice, not a combination lock.
No. You may choose up to four.
You may reroll one, two, three, or four dice from the Celestial Pool. Sometimes the table requires a great upheaval. Other times, one stubborn die is all that needs to be cast back into fate.
Nothing happens automatically. A valid Astral Sign scores only when you call it.
If your Assembly Row has exactly four dice and forms a valid Astral Sign, including the current Oracle Halo for Omen and no Oracle Halo for Eclipse, you may call “Astral Sign!” and score it on your turn. You are not required to score it just because it is valid.
If you do not call it, the dice stay in your Assembly Row. The Sign remains vulnerable. Another player may later Shift, Parley, or otherwise affect your row before you get another chance to score it.
If your timer reaches zero before you call the Sign, resolve Sabotage as normal. Do not score the Sign.
Table Customs
Astral Assembly is the formal name of the game.
Astral Array is an older ceremonial name used in certain parts of the game’s history, especially when referring to rare sets, old houses, collectors, and the hidden arrangement of the dice faces.
Assembly speaks of what the player does. Array speaks of what the dice become.
The table is open, but the future is not.
A strong player must watch the Celestial Pool, their own Assembly Row, other players’ rows, Crowns, dots, halos, the current Oracle Halo, possible Signs, Sign-count tiebreakers, timer pressure, and social intention.
The rules are simple. The table is not.
The Court Announcement is a good first custom.
It requires players to announce their chosen action before touching dice. This makes the table clearer, more ceremonial, and less prone to accidental handling.
It also makes every move feel deliberate.
The rules pause the timer, but the table should still expect an answer.
When a Parley is offered, the opponent may take a brief moment to consider the swap. They may not use the pause to study the entire table, plan a future turn, or hold the game hostage.
A Parley is a negotiation, not a throne room siege. For stricter tables, agree before setup that a Parley must be answered within five seconds.
The official rules do not require silence, but the table should choose its custom before play.
Some groups allow warnings, teasing, and open strategy. Others forbid advice once the timer begins. Both styles work, but they create very different courts.
For serious games, use the Silent Assembly custom: no advice during the active player’s turn unless a rule needs clarification.
No. One timer is enough for the rules.
One hourglass per player is a matter of ceremony, not necessity. It makes the table richer, gives every player their own sentence of sand, and suits commissioned sets beautifully.
A single glass governs the game. Many glasses dress the court.